Install, configure, and optimize Kubuntu 19.10 and Apps for Web Development in a few hours.
News
2019-12-02
- Added Assessment advising against 19.10 due to regressions
2019-11-02
- Add System Settings paths
- Verified and updated Apt sources
- Audit through Section 9
Assessment of 19.10 as of 2019-12-02
After extensive testing, we do NOT recommend 19.10 for daily use. There are two major regressions that remain unresolved.
-
The CPU throttling on at least some CPUs (confirmed on i7-9750H and i7-8750H) does not work, with the frequency always pegged at maximum. This results in less battery life and higher heat.
-
Geekbench4 scores are reduced to 50% of their values prior to updates (26K vs. 13K, for example) on these same processors.
We strongly advise using 19.04 or 18.04 where these regressions do not exist.
If you chose 19.10
The 19.10 regressions will result in lower performance and higher power consumption. However, they may be resolved in the near future as we have filed bug reports with Kubuntu developers. There are a few additional Plasma bugs that are annoying (e.g. lock screen image selection) but minor. Using a LiveCD to test the regressions DOES NOT work as they do not occur until after initial updates. We are currently monitoring progress using an alternate 19.10 install.
If you choose 19.04
We found 19.04 very stable and performant over 6 months of average 10 hour days using it. Backports provides most of the desirable new KDE features. However, it has an EOL date of 2020-01-18, and therefore there may not be a direct upgrade path to 20.04 LTS. If you insist on 19.04, you may need to back up data and then install 20.04 LTS fresh in May 2020.
If you choose 18.04
This is also very stable and performant. Backports provides many desirable features, but some from KDE are missing. The upgrade path to 20.04 LTS is obvious.
Introduction
Purpose
Provide a complete and thoroughly tested guide to install, configure, and optimize Kubuntu 19.10 (K19-10) and web development tools.
- Show screenshots for almost every step
- Ensure answers are thorough and well-researched
- Provide an explanation for each step
- Add links to external resources when beneficial
Why this guide?
Because it works. The entire procedure has been end-user-tested five times with the author present. Feedback from these sessions was used to ensure accuracy and minimize the opportunity for mistakes.
Why Kubuntu?
The Plasma Desktop with KDE apps looks great, is easy to use, starts and runs fast, and is easy on resources. Kubuntu is an Ubuntu derivative so it has the widest array of commercial Linux application support available. The Apt package ecosystem is mature and almost all software can be installed with it. Daily updates keep the software current and remove security risks quickly.
Why this Author?
The author has used Unix or Linux as his primary OS for web app development since 1993. He adopted RedHat in 1998 and then Kubuntu in 2006. He has managed the software on multiple Linux clusters with dozens of servers each. He is also RHEL5 certified (giggle if you must) and is the author and maintainer of Kubuntu Preferred Apps Spreadsheet.
How to use this guide
This is a long document with 98 screenshots, and it is far too easy to scroll past a step when using the scrollbar. To avoid this we suggest using the arrow keys to scroll instead and pay attention to the step number to ensure it is in order.
Table of Contents
- Select Hardware
- Prepare Install Image
- Review Selected Apps
- Create a Virtual Machine
- Install Kubuntu 19.10
- Apply Updates
- Optimize VirtualBox
- Add Repos and Install
- Configure Plasma
- Install Addon Apps
- Optimize Apps
- Trouble Shooting
- Appendix A: Recent Build
- Appendix B: ShrinkPDF
- Appendix C: Laptop
1. Select Hardware (top)
Select hardware that is tested and compatible with Desktop Linux.
- CPU: AMD or Intel x86. Both are excellent.
- GPU: Nvidia or Intel. Prefer Nvidia for superior performance, stability, CUDA, deep learning support. AMD GPUs have gotten much better recently, but the author has not worked with them.
- Keyboard: We like the Logitech K310 washable keyboard. Of course, just about any keyboard will work just fine.
- Pointer: We like the Logitech MarbleMouse. The trackball provides great control while avoiding repetitive stress injuries. Again, just about any 3-button or scroll-wheel mouse will work fine.
- Webcam: We like the Logitech Webcam C615. Works out-of-the-box with Hangouts, Skype, Zoom, and other apps. Includes 1080p/30fps and a good mic.
See Appendix A for my most desktop recent build which has been amazing. See Appendix C if you would like to purchase a ready-to-use laptop. When purchasing a laptop, select one designed and shipped with Linux like those offered by System76, Dell, or Levono. Otherwise, look online to find those that work best with Ubuntu. Make sure key capabilities like screen, WiFi, webcam, trackpad, keyboard, GPU, monitor, battery, and power management are well supported. Do not attempt to install on a recent MacBook Pro. Apple is openly hostile to Linux on their hardware and has ensured the experience is at best miserable and likely impossible.
2. Prepare Install Image (top)
2.1. Download the ISO Image
Download the 19.10 bootable ISO image directly from Kubuntu, it should be named kubuntu-19.10-desktop-amd64.iso. Enter the following into the terminal to ensure the SHA256 checksum matches the one found on this page. The checksum will change as the ISO is updated so please modify the _hash='...' line as needed.
# Change this hash with value provided from kubuntu.org
_hash='e56388512a0610bd991192b197a13f1496c107377d9c96d332939c08e305b028' \
&& if ( sha256sum kubuntu-19.10-desktop-amd64.iso |grep -v "${_hash}"); then
  echo "--- Results ---"
  echo 'FAIL. DO NOT USE this ISO, it does not match checksum';
  echo 'Please notify Kubuntu of this issue.'
else
  echo '--- Results ---'
  echo 'SUCCESS. ISO passes checksum';
fi
2.2. Create Bootable USB Drive
2.2.1. When using a virtual machine
Skip this step. VirtualBox uses the ISO file directly.
2.2.2. When using a physical computer
Insert a small (4-8GB) USB drive into the computer with the downloaded ISO image. When using a the Ubuntu OS, we may install the Start Disk Creator with sudo apt install -y usb-creator-kde. Similar tools are available for other OSes. Select the ISO image and select the USB drive and the click on Make Startup Disk. All content of the USB drive will be replaced in this operation.
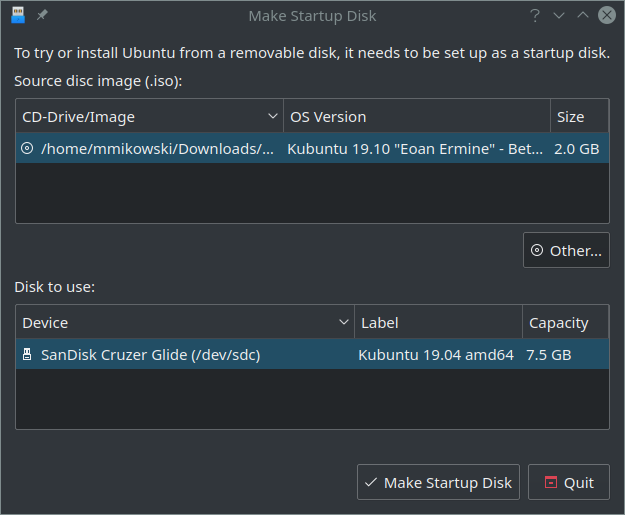
To use the CLI instead, see this Ask Ubuntu answer
3. Review Selected Apps (top)
Review the K19-10 Selected Apps chart below. These apps are installed or optional in the steps below. Adjust as needed. If you feel an app should be here but isn’t, please let me know in the comments!
At present, these are the planned additions: Kubernetes, Azure CLI, AWS CLI, Google Cloud CLI, Zoom, Tensor Flow, Nvidia Developer tools.
Key: repo = standard repo; crepo = custom (added) repo, custom = custom installation; addon = added after repo install
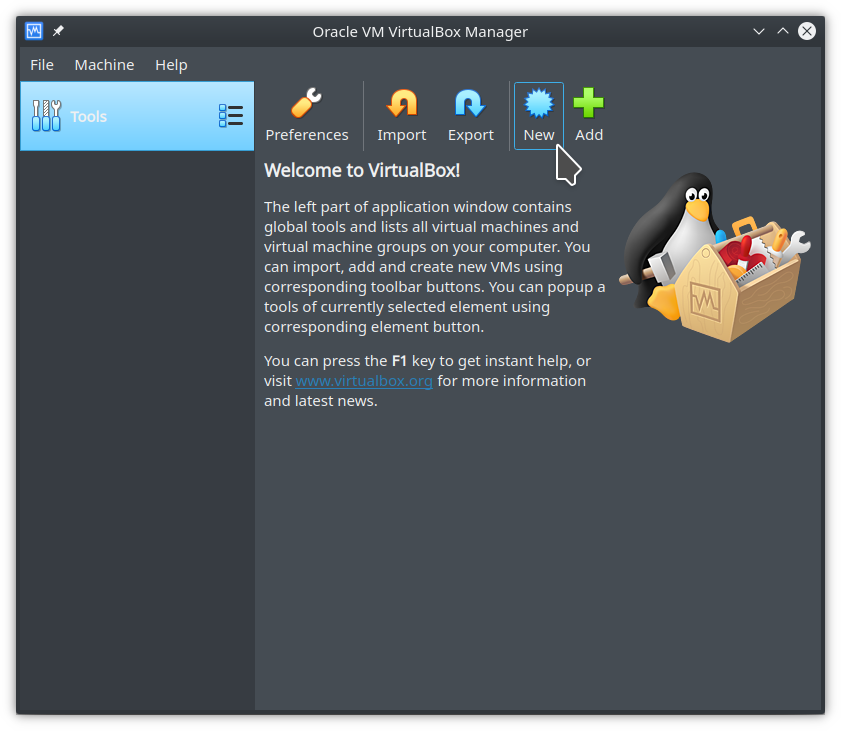
4.3. Create a virtual machine
Start VirtualBox and click on New.
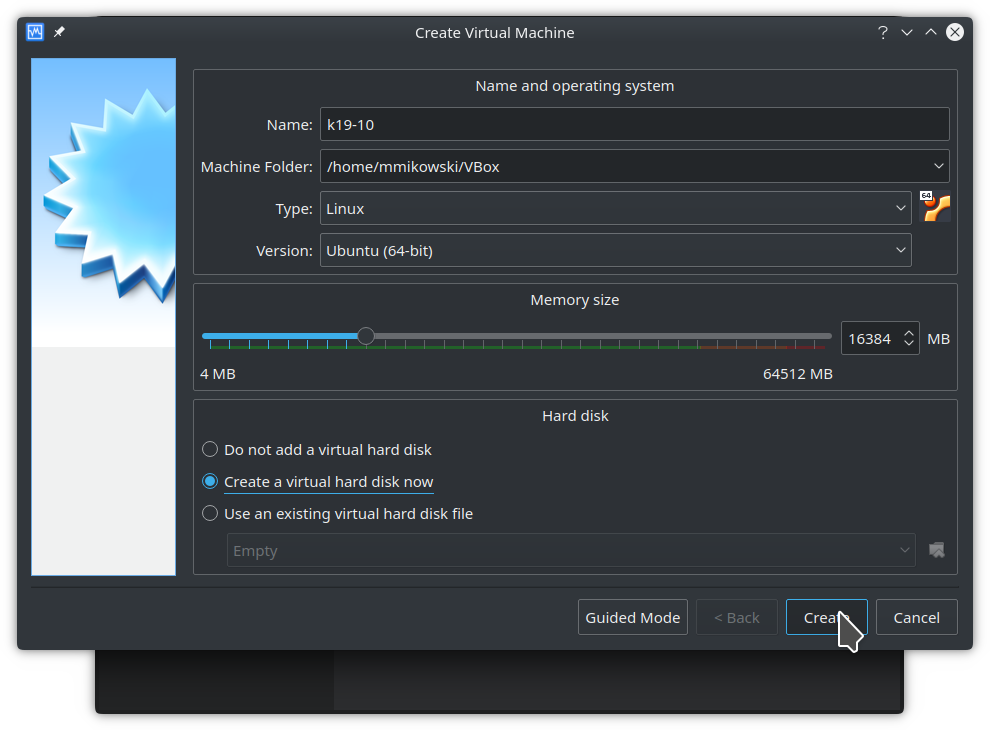
4.4. Set details
Inspect every field here. Try to provide at least 4GB of RAM for testing purpose. Plasma is pretty light on resources, but apps like Gimp and IntelliJ eat lots of RAM when editing large images or projects.
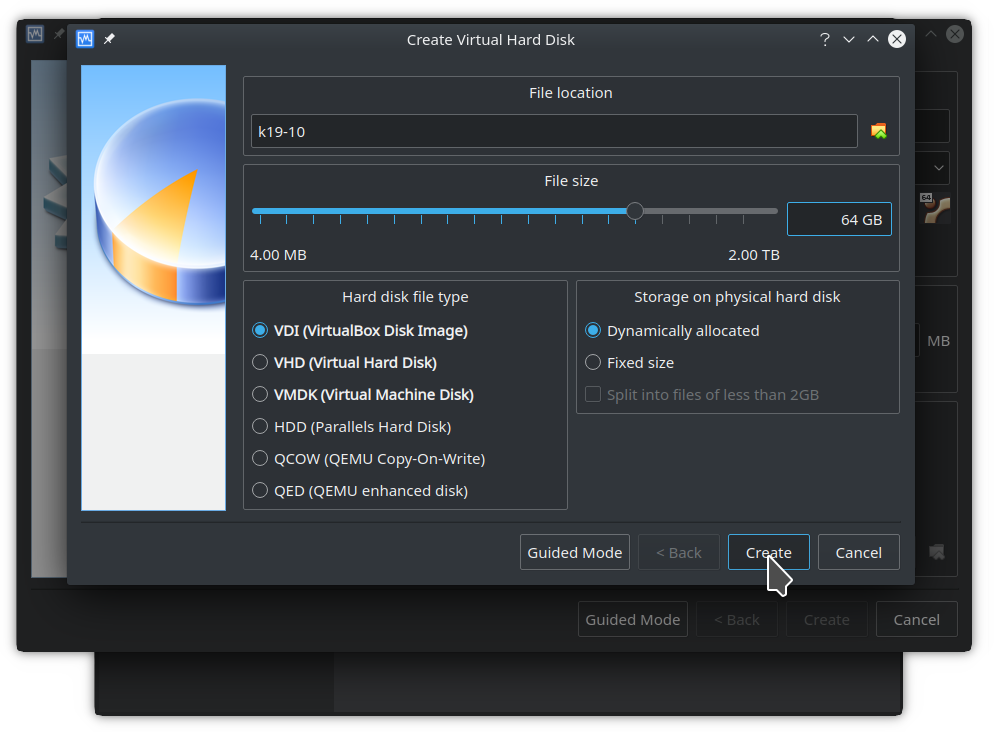
4.2.4. Create storage
4.6. Adjust resources
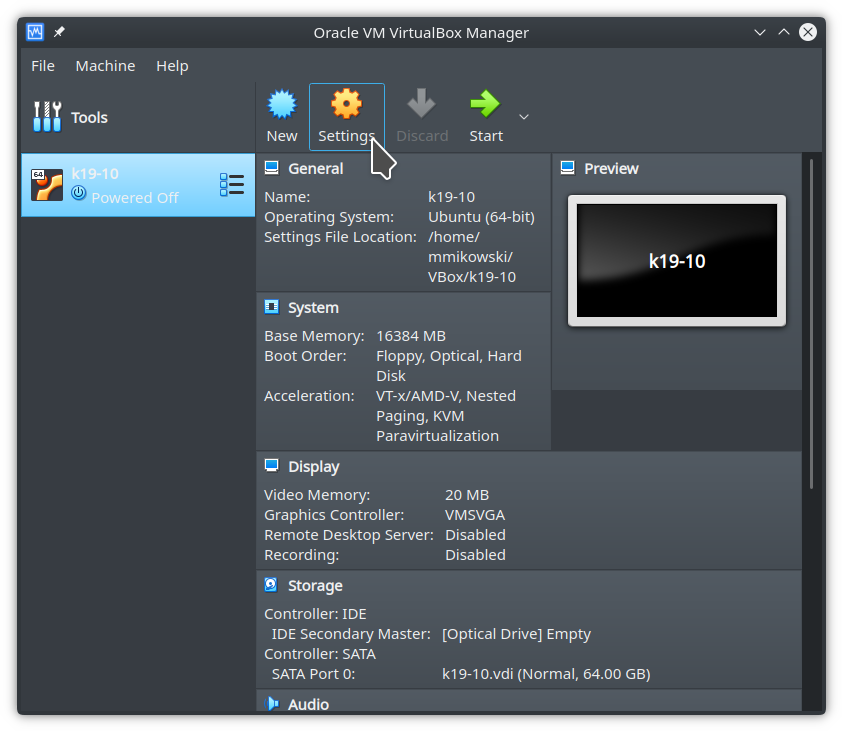
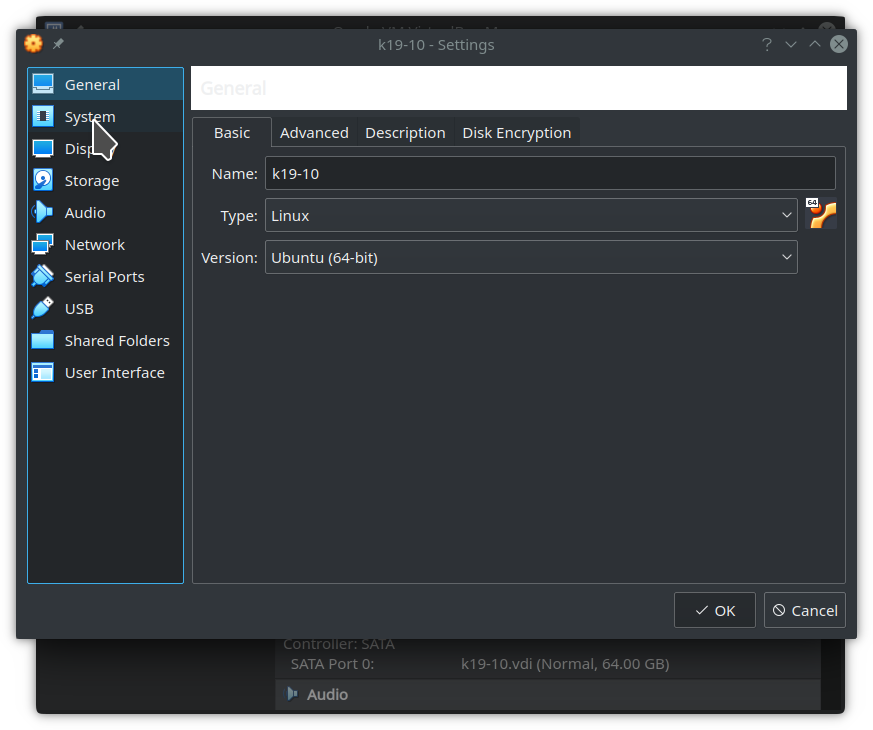
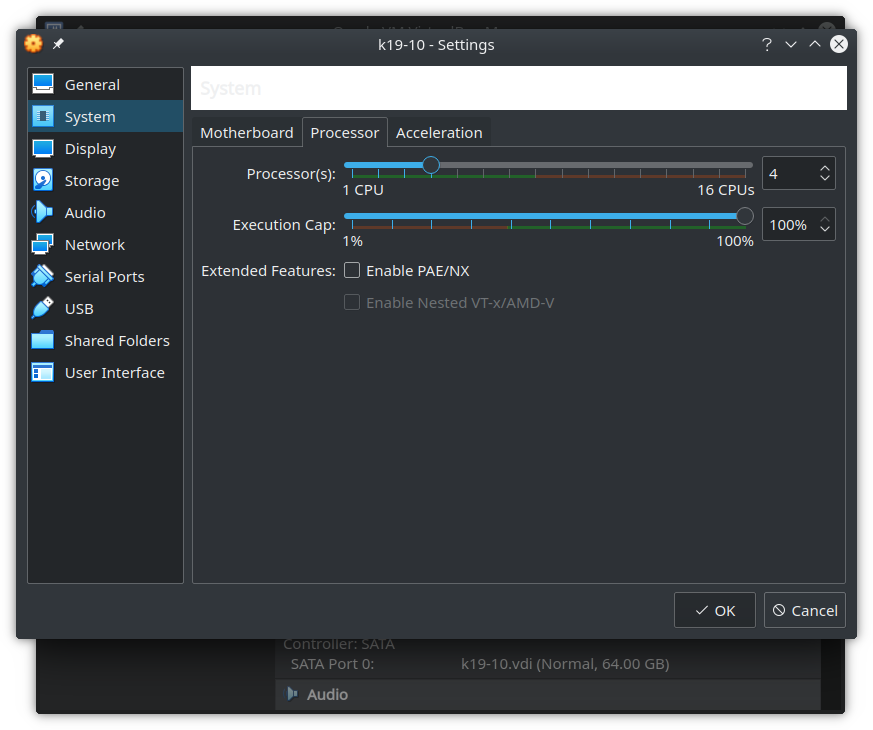
4.7. Allocate threads
Allocate a minimum of 2 threads.
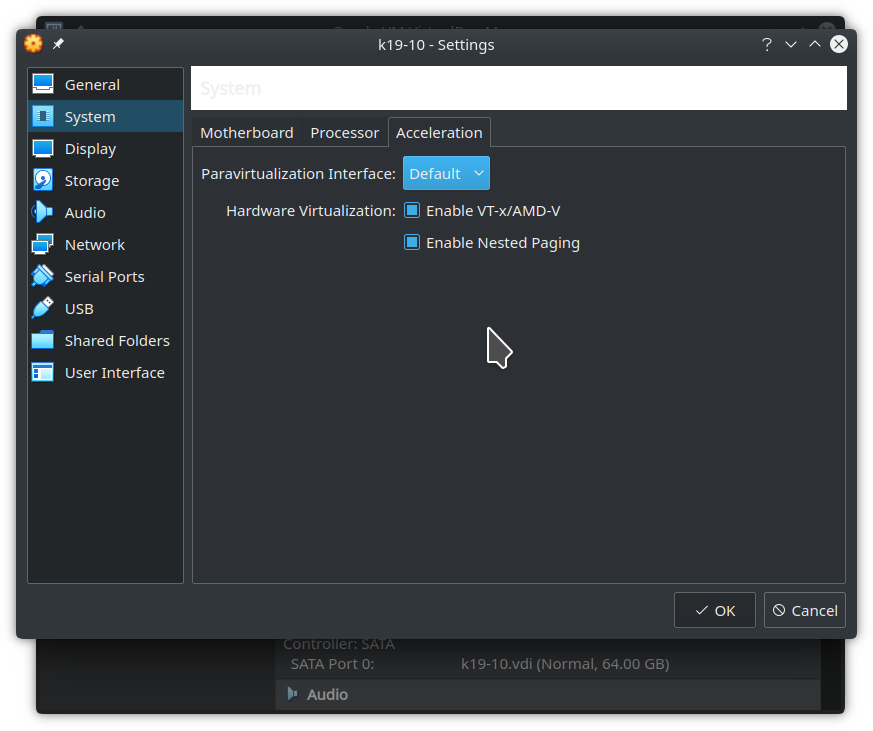
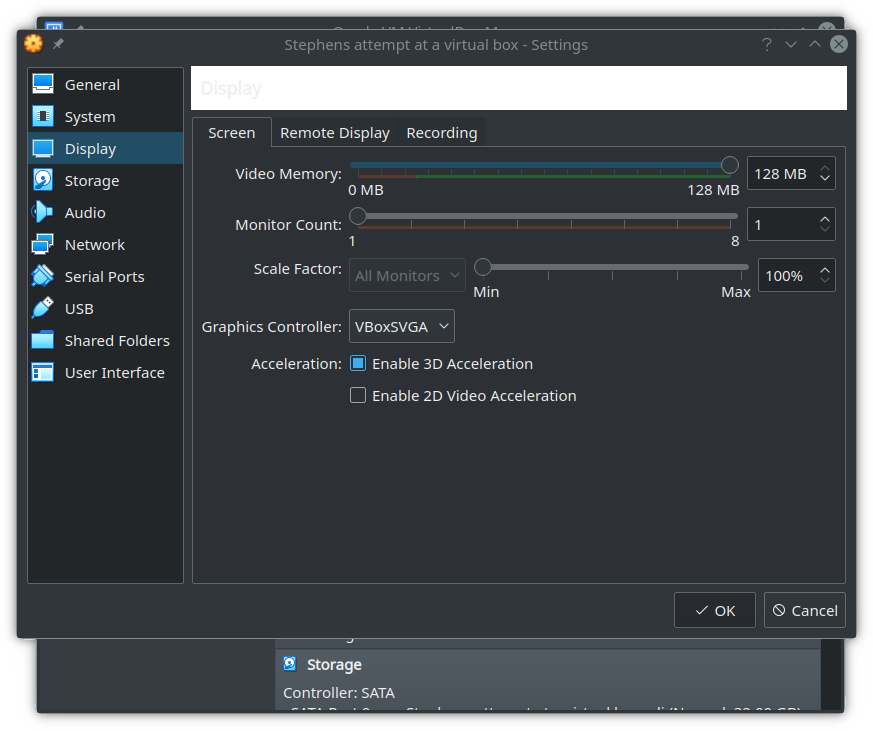
4.8. Configure display
Turn off compositing <shift + alt + f12> on both the host and guest OS to maximize performance. Make sure to select VBoxSVGA as the Graphics Controller and Enable 3D Acceleration. Do not Enable 2D Video Acceleration.
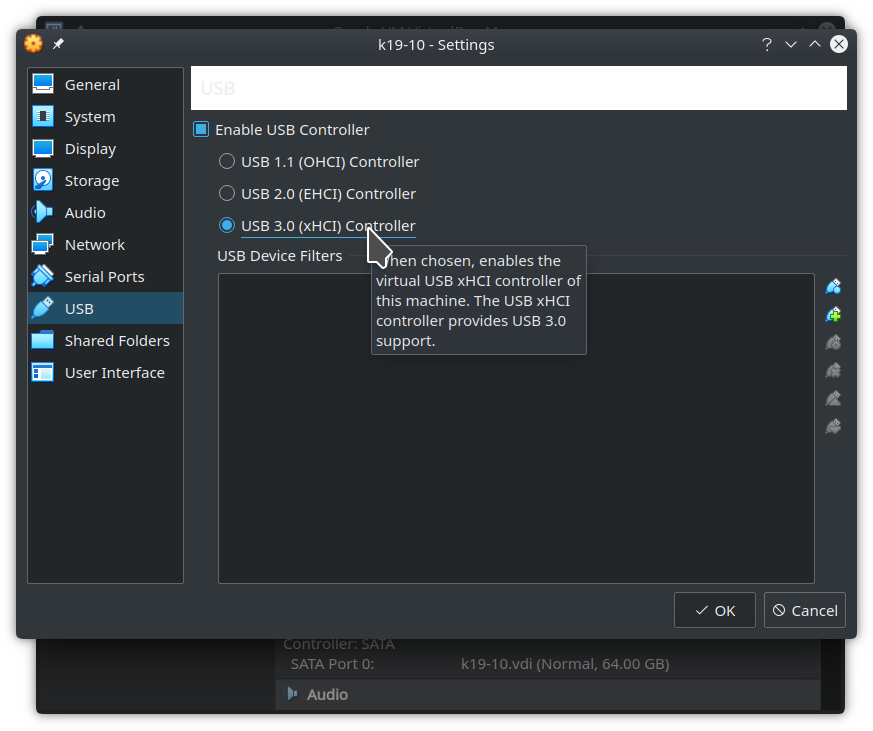
4.9. Configure USB
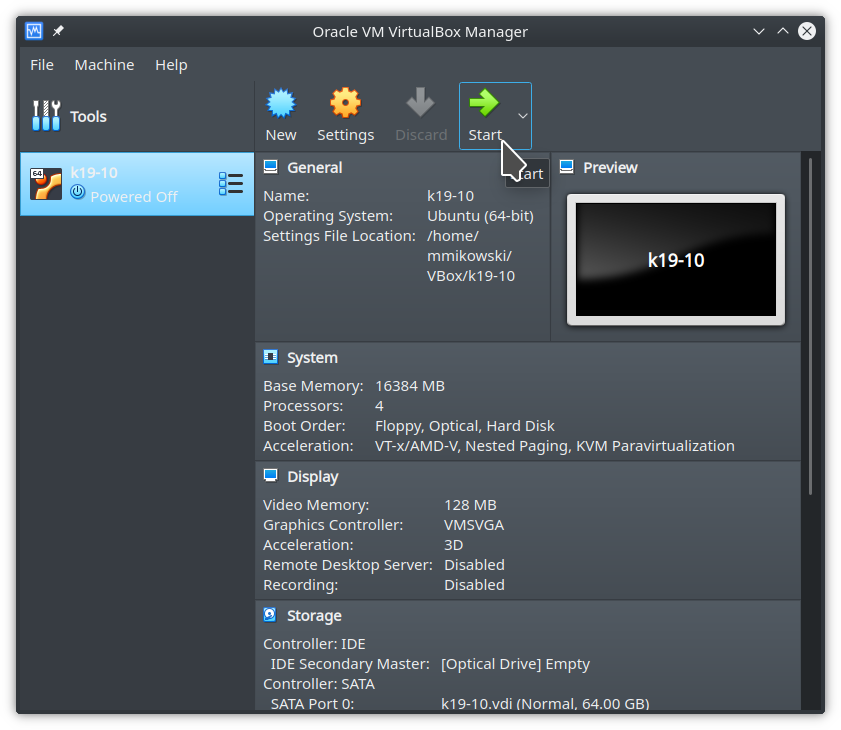
4.10. Power-on
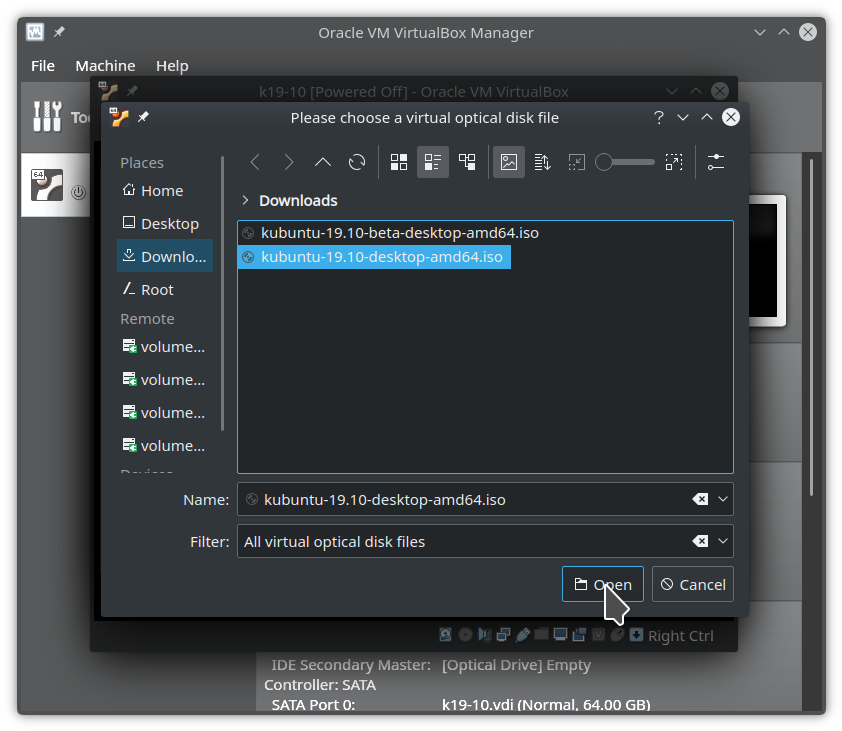
4.11. Select Kubuntu 19.10 ISO
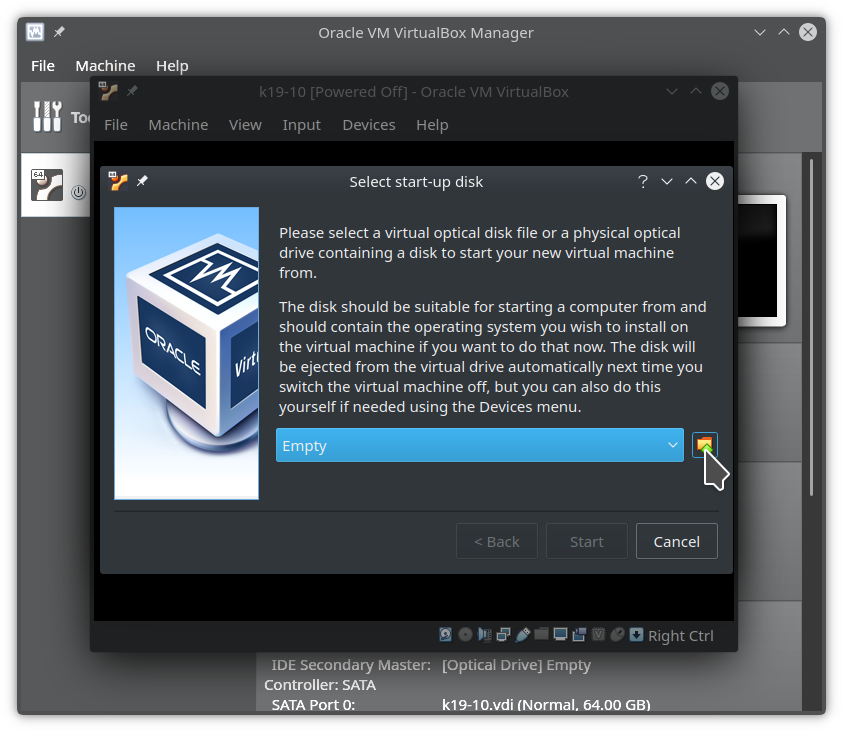
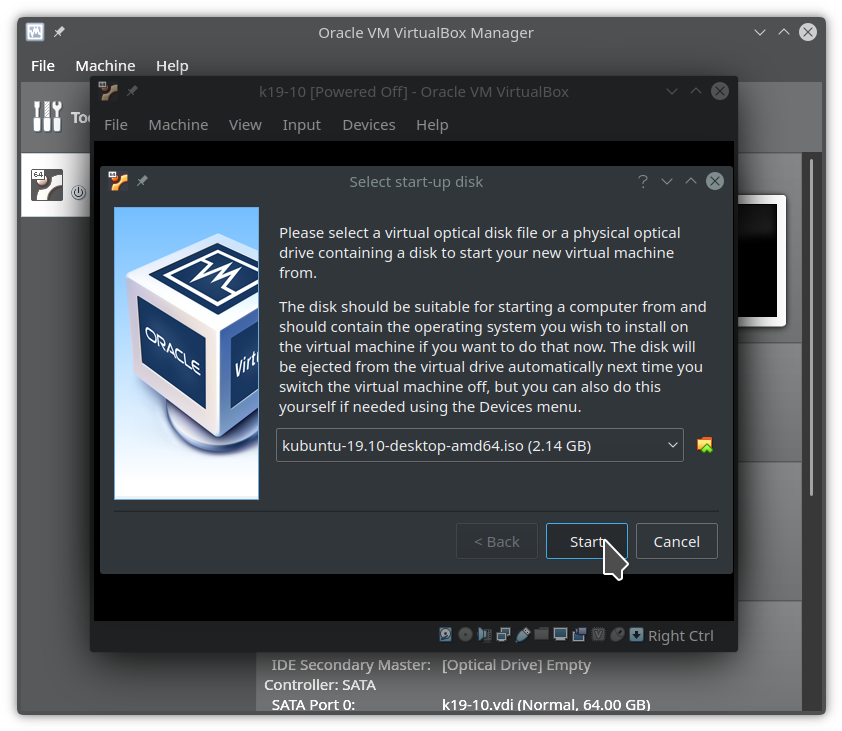
4.12. Click start
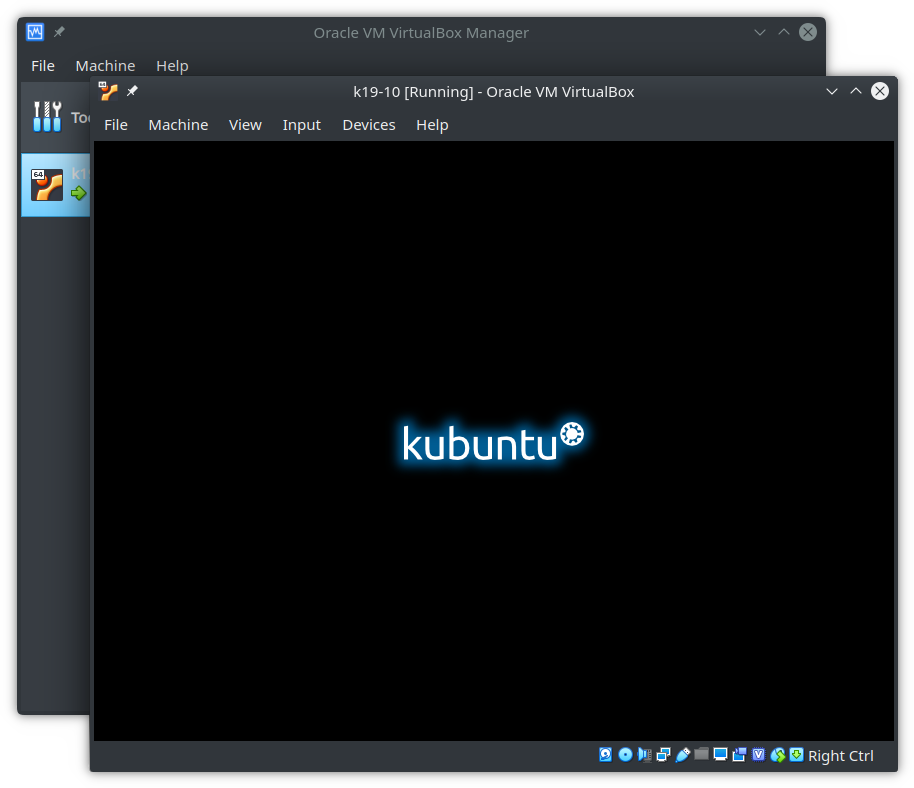
5. Install Kubuntu 19.10 (top)
5.1. Boot from the USB Drive
5.1.1 When using a virtual machine
VirtualBox prompts for the ISO file to boot from when a new virtual computer is started. Provide the ISO file previously downloaded, e.g. kubuntu-19.10-beta-desktop-amd64.iso.
5.1.2 When using a physical computer
Power-off the target computer and insert the Bootable USB Drive into a USB port and then power-on. One may need to select the boot device (typically using the F12 key) if the installer does not appear and try again.
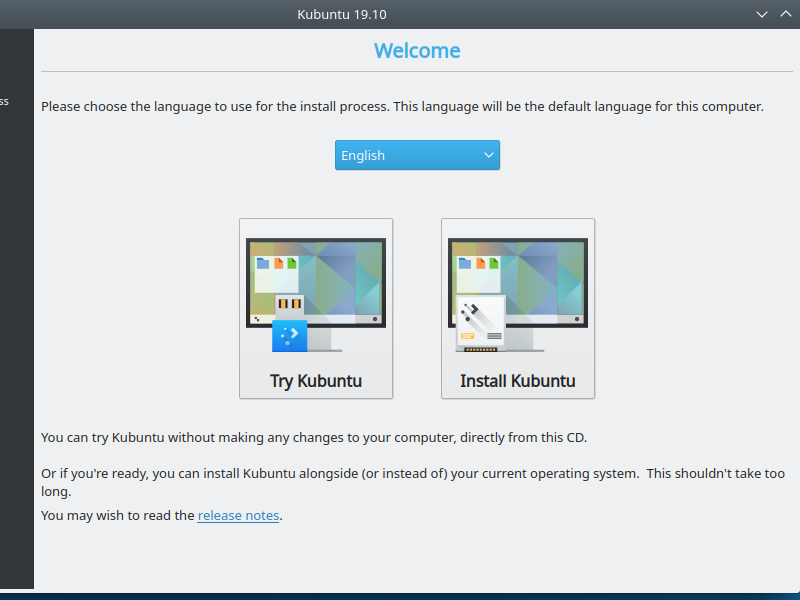
5.2. Click Install Kubuntu
Once the installer is present, click on Install Kubuntu to begin.
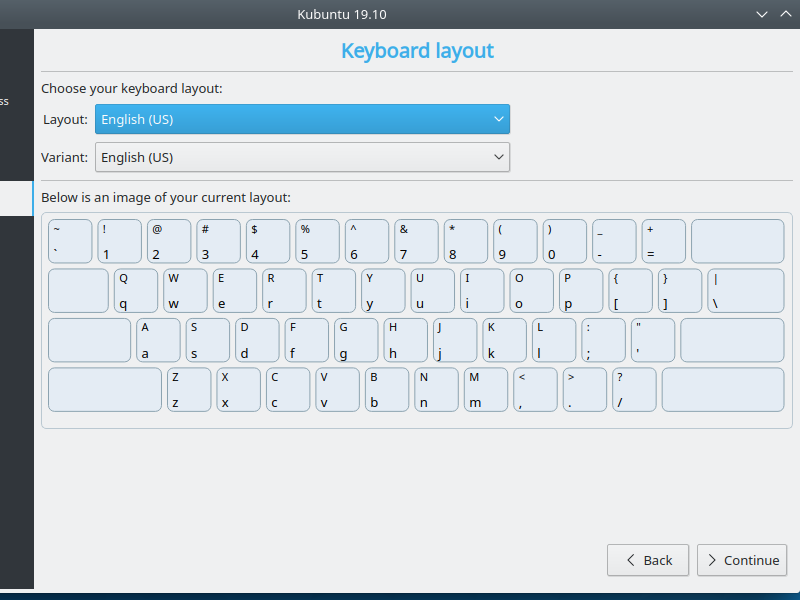
5.3. Select keyboard
This typically requires no changes.
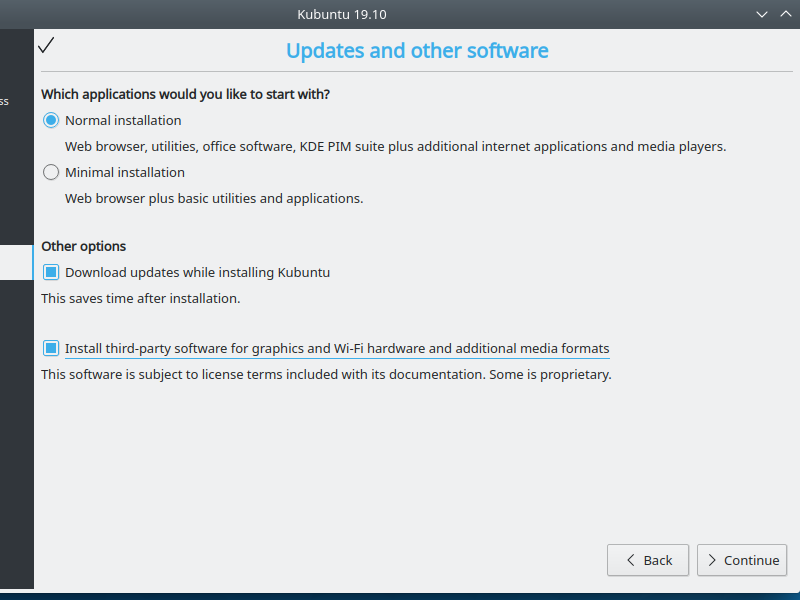
5.4. Select default install
Select the default install. Skimping on tools to save perhaps a GB or two of diskspace is hardly worth it. Enable third-party software for graphics, hardware, and media.
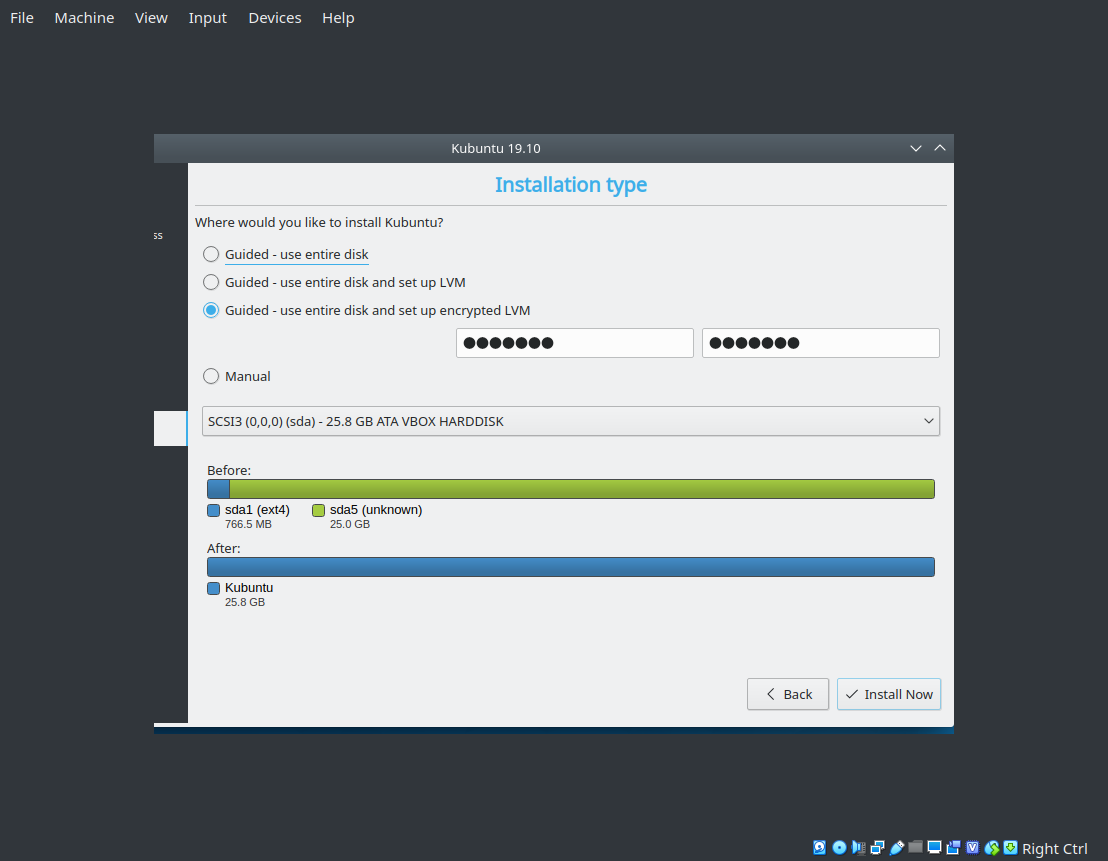
5.5. Specify storage
There are a few options to configure storage. Pick one of the two below.
5.5.1. Encrypted storage
Enter the same password in each of the two text boxes. If one clicks Continue and then Back the LVM will be written to disk. Don’t do that, One can use fdisk from the live CD to remove the partitions if needed. More detail is outside of the scope of this article.
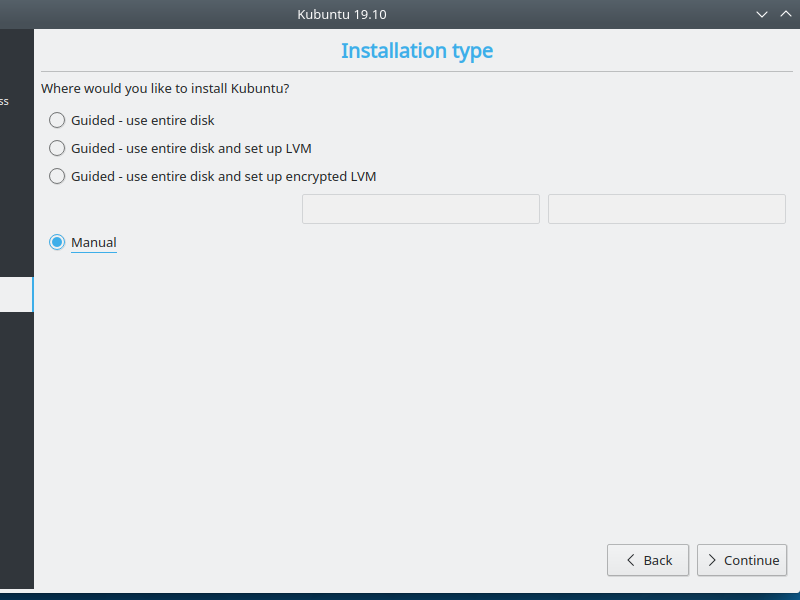
5.5.2. Specify custom partitions
Skip this section if encropted storage was used.
Select Manual and click Continue to partition disk.
Click to select the /dev/sda device and click Add. A modal window appears. Set the Size to 8192 MB, set the Type to swap space, and then approve the partition. This swap is used by the system and also is needed (or at least preferred) for the suspend-to-disk feature of the OS.
Click again on the /dev/sda device and click Add. A similar modal window appears. Accept the Size value to use all the remaining space. Set Type to Ext4 and set Mount point to / and then approve the partition.
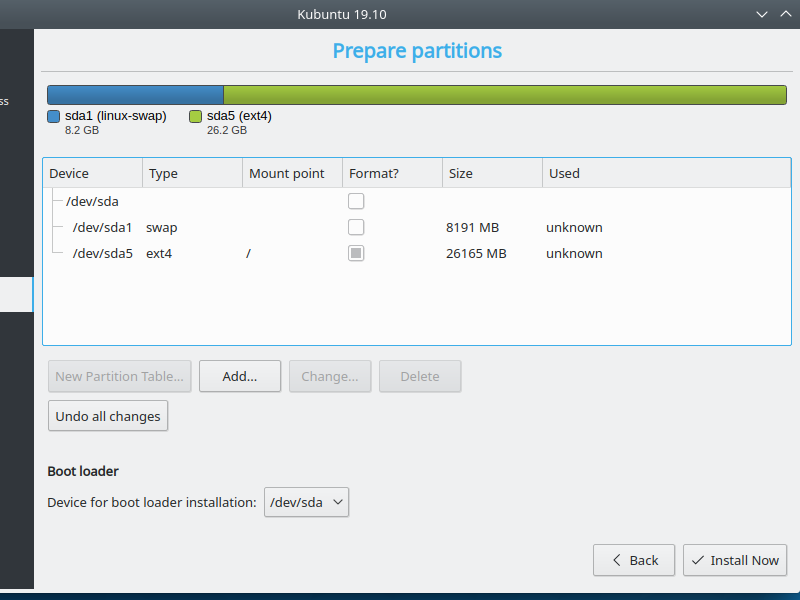
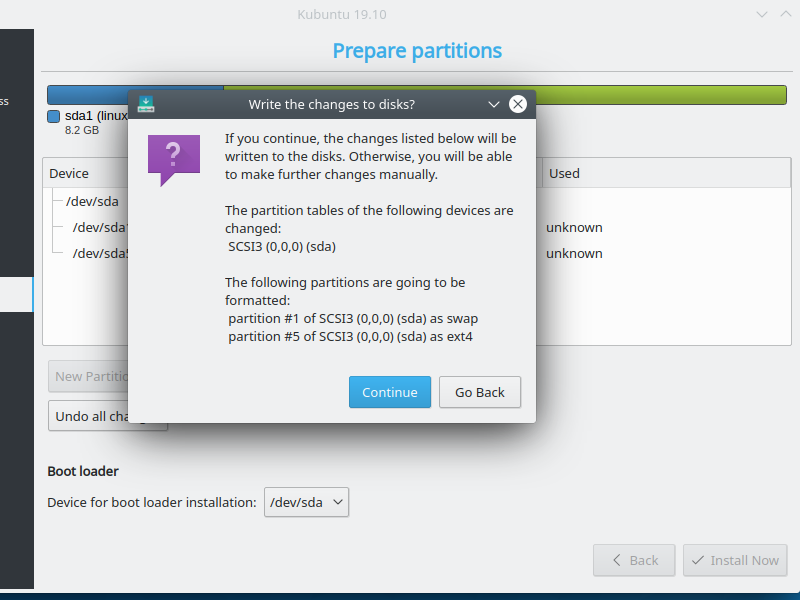
Click on Install Now. A modal window appears warning that continuing will remove any prior content in the partitions. Click on Continue to proceed.
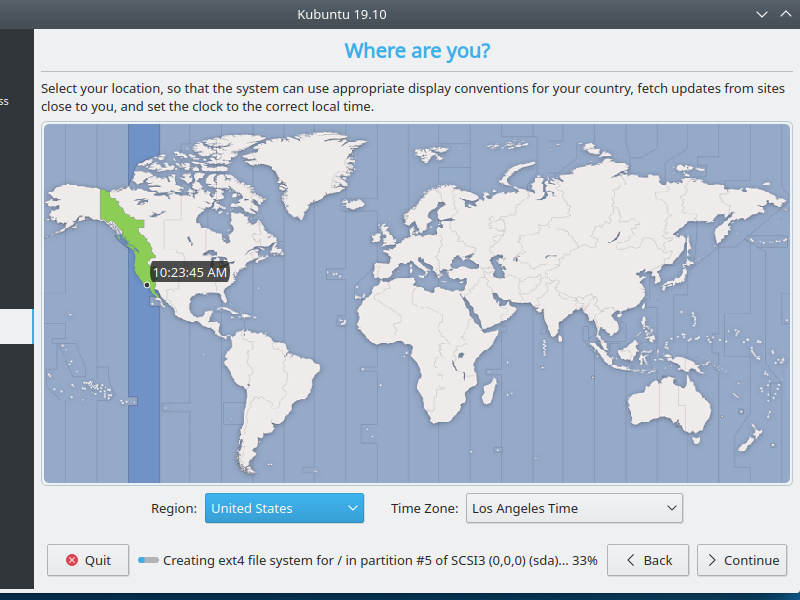
5.6. Select time zone
Select a time soon and click Continue.
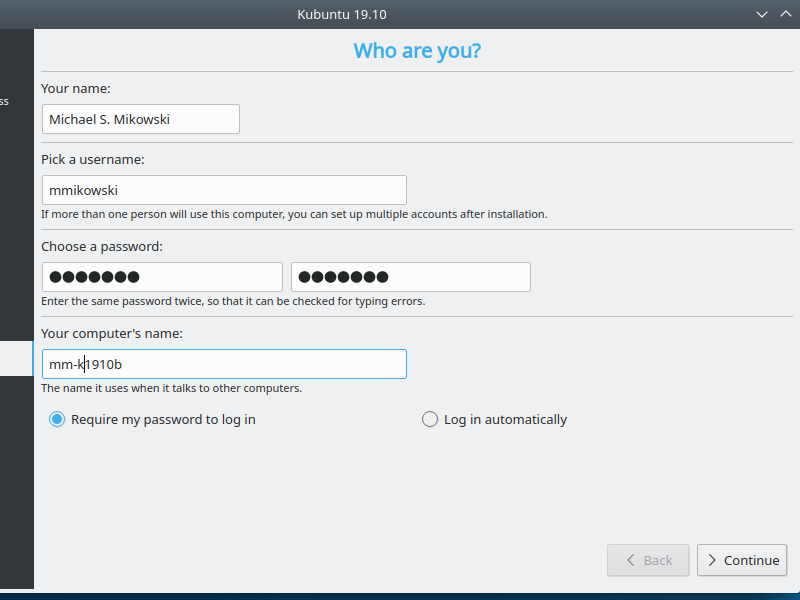
5.7. Create admin user
This user is granted admin (sudo) rights.
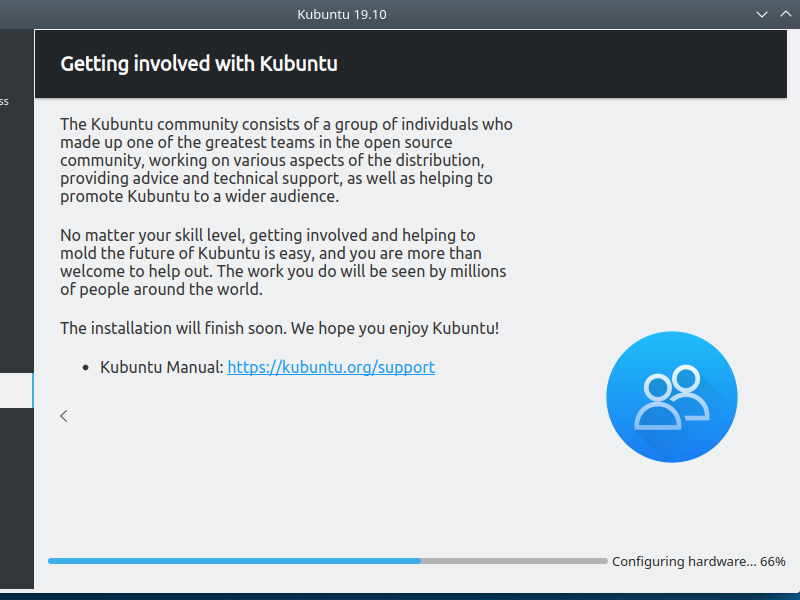
5.8. Watch the slide show
A test install with 40MB/s internet and fast hardware took 3 minutes, but it could take quite a bit longer if the storage, internet, memory, or CPU is slow.
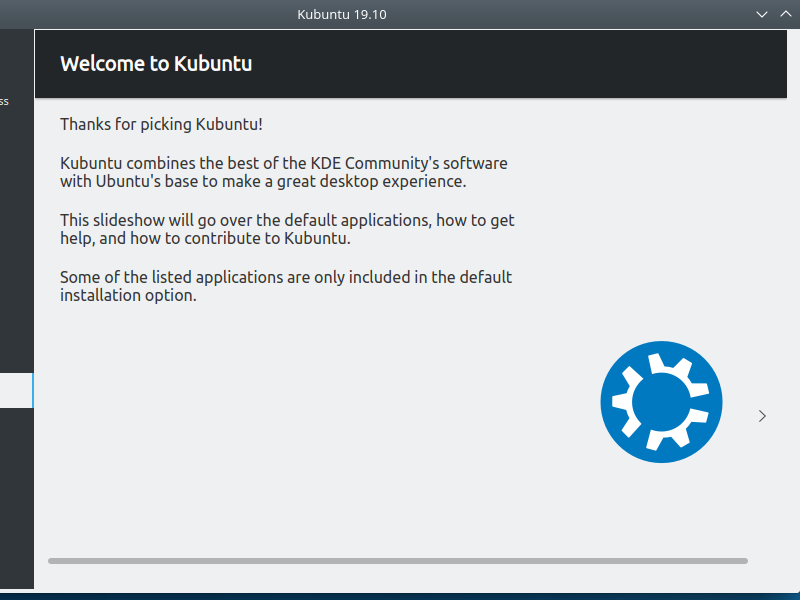
More slides appear as the installation progresses. This is normal.
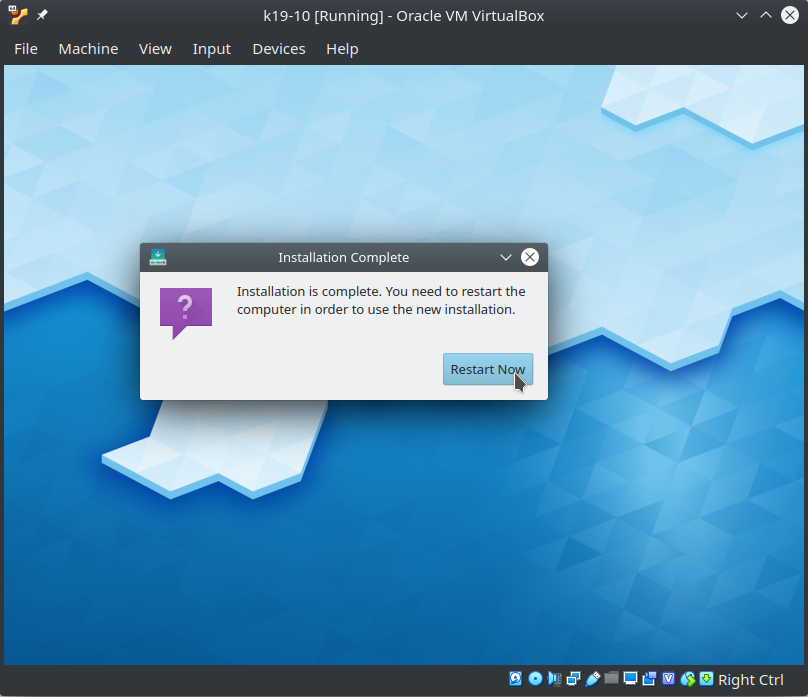
5.9. Reboot
Elect to reboot the system after installation is complete.
6. Apply Updates (top)
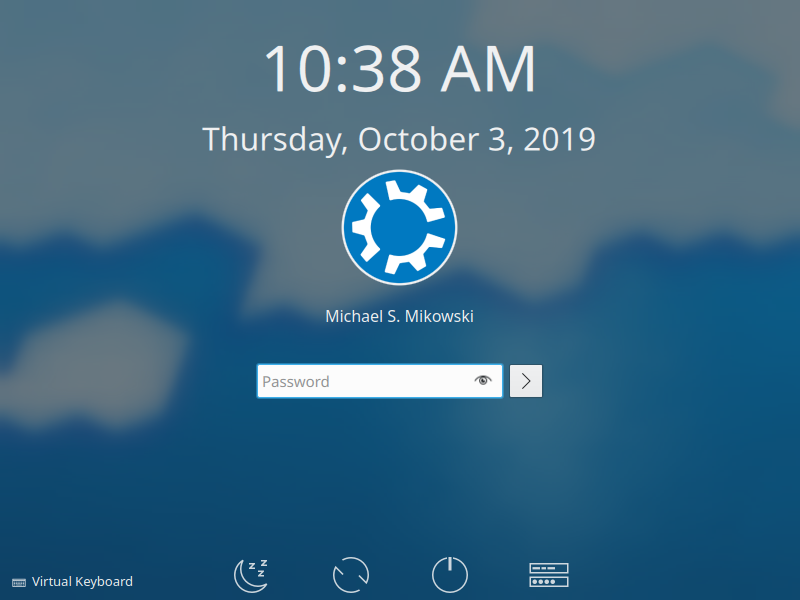
6.1. First sign-in
This sign-in screen should appear 20-30s after boot. Enter the username and password provided earlier.
6.2. Enjoy the splash screen
On modern hardware this appears appears for less than 5 seconds, and often less than one second. We disable it in the steps below.

6.3. Review desktop
This is the default desktop.
6.4. Open Discover app
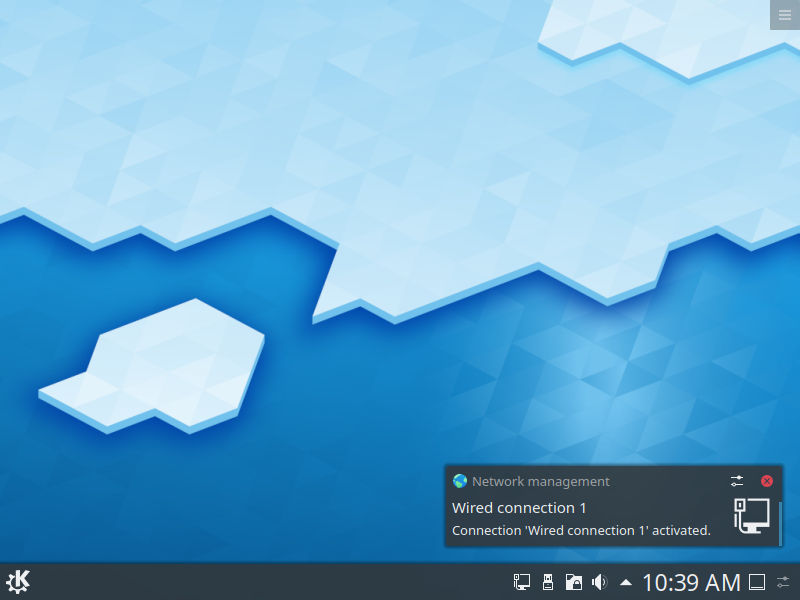
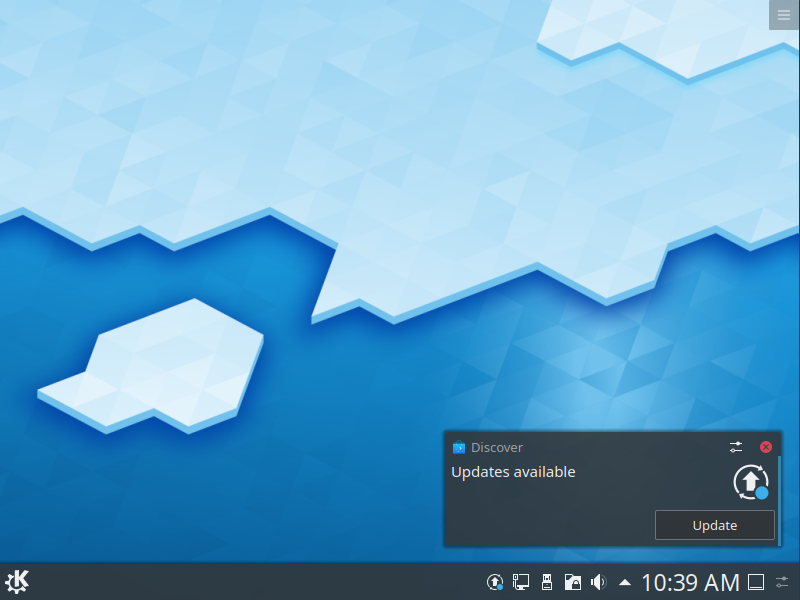
The user is notified of updates on sign-in. One should apply updates updates immediately after install and at the beginning of every work day. Click on Update in the notification to open the Discover software package management app. One can also start Discover from the K-menu at the Bottom Left. Once open, click on Updates at the bottom left of the app to see all updates.
6.5. Initiate updates
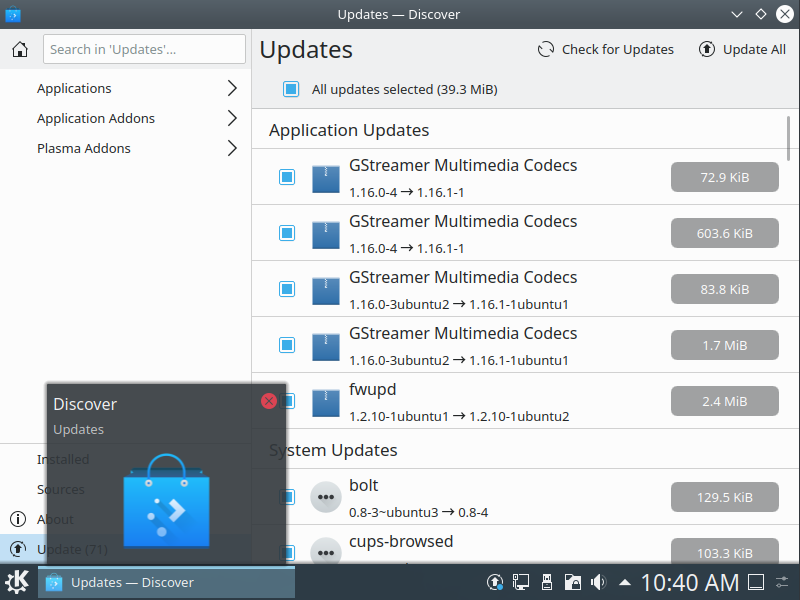
There should be many updates available (20 or more). Click on Update All at the top right.
6.6. Authorize updates
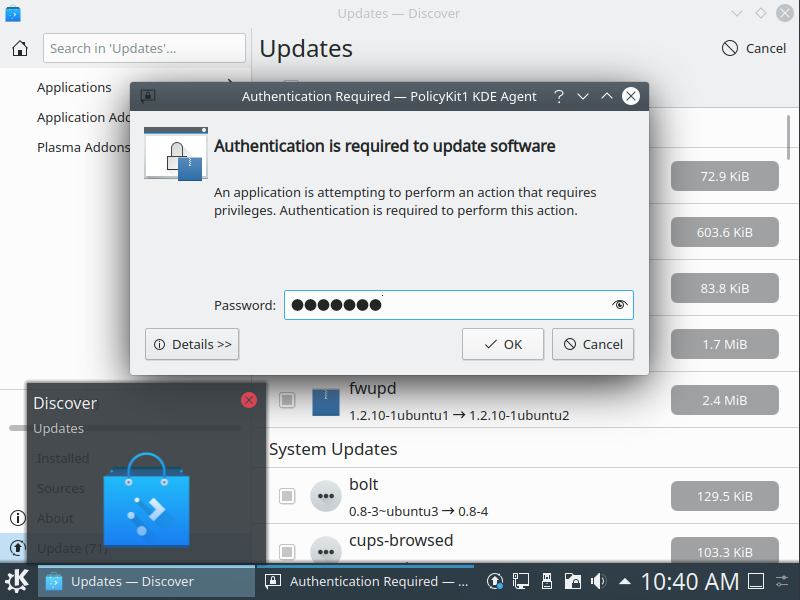
Provide the user password to proceed.
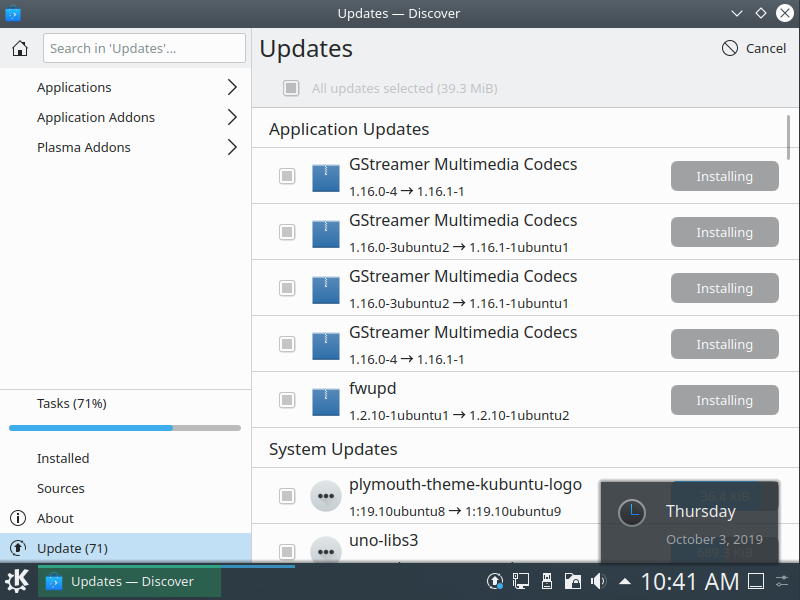
6.7. Watch updates progress
The task bar indicator shows percentage completion. Updates should take a few minutes.
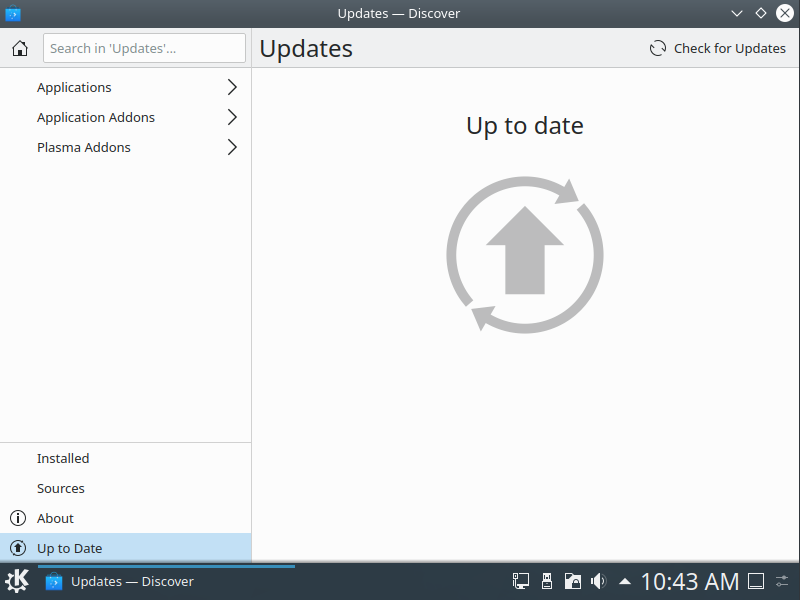
6.8. Complete updates and power-off
Successful completion of updates should look like the following screenshot. Reboot the system using K-menu > Leave > Restart.
7. Optimize VirtualBox (top)
Skip this section when installing on a physical computer.
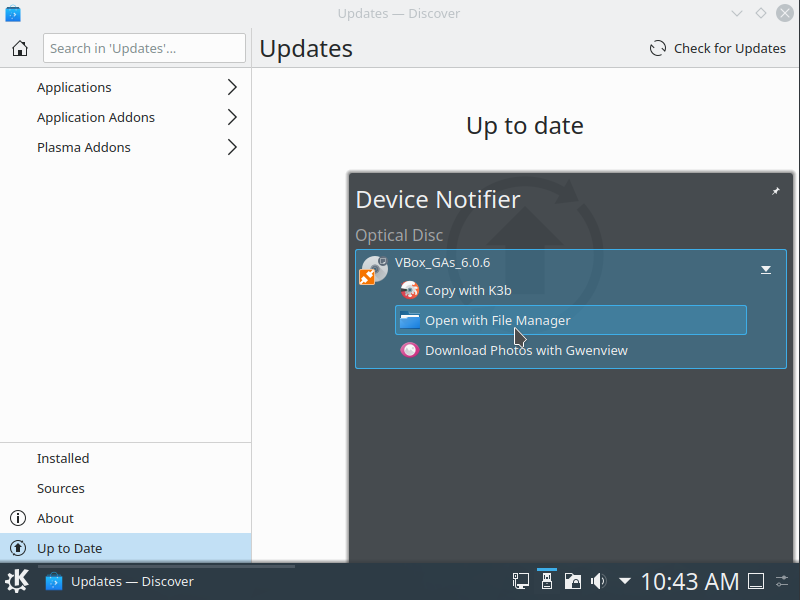
7.1. Open guest additions disk
The guest additions appear as an optical disk. Click on the USB icon to access this disk and open it with the file manager.
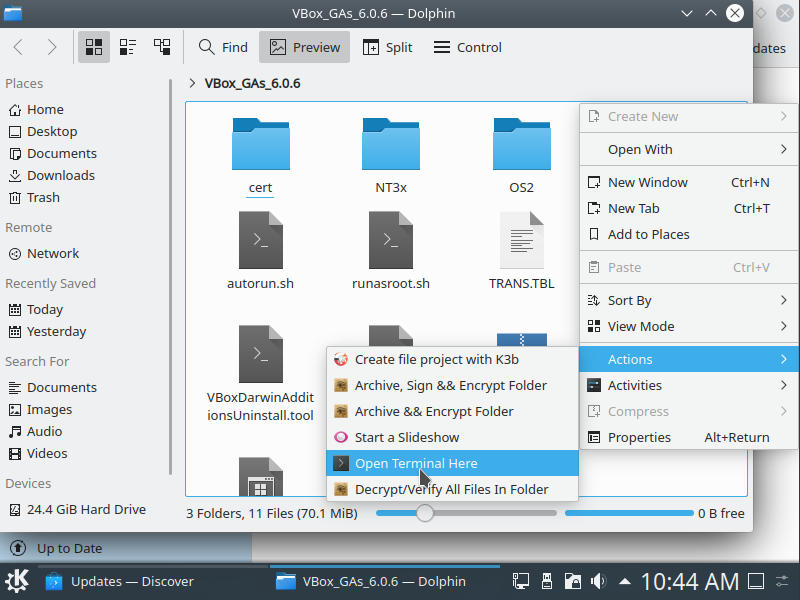
7.2. Open terminal
Right click on the file view and select Actions > Open Terminal Here.
7.3. Install additions
Enter the following into the terminal to install the prerequisite packages.
sudo apt install -y build-essential gcc make perl dkms;
Enter the following into the terminal to install the additions.
sudo ./VBoxLinuxAdditions.run
Once installation is complete, Reboot the system using K-menu > Leave > Restart. Then in the Virtual Machine menu set:
- Devices > Shared Clipboard > Bidirectional
- Devices > Drag and Drop > Bidirectional
8. Add Repos and Install (top)
The Apt software management system in all Debian Linux system is simpler and more complete than other OSes. Almost all third-parties provide Apt support for their software with a few exceptions. Below we add the repos needed for the software we wish to install and keep current. Most of the repos are PPAs. Packages are are signed which greatly reduces the opportunity for a bad actor to insert a Trojan Horse like a key-logger or phone-home feature into them.
The typical way to add a repo is to use the a command like sudo add-apt-repository "${_repo_spec}". This method ensures that encryption keys are added to the package management database. Commercial vendors typically use a similar process but add keys in a separate step. In this guide we use a script to download registered keys all at once.
8.1. Open Konsole
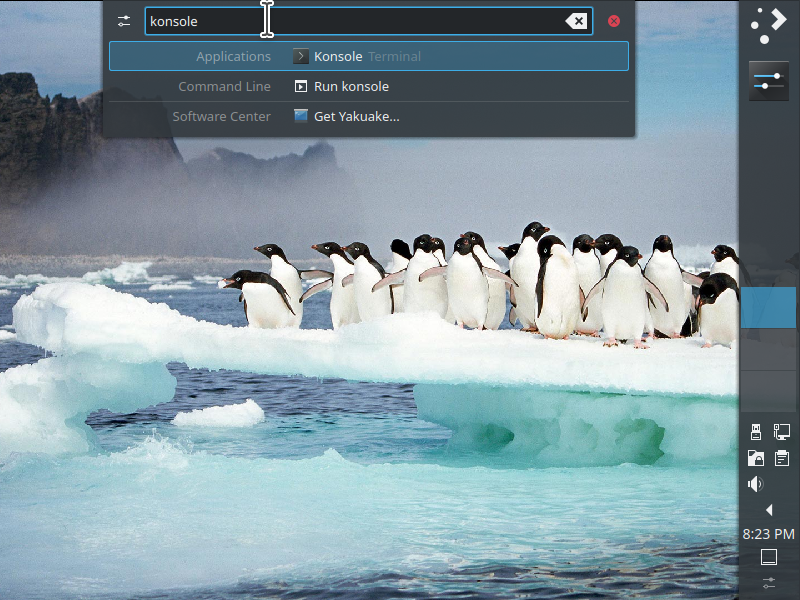
The KDE terminal app is called Konsole. Press <alt + space> and type konsole and then press <enter> to quickly find and start it.
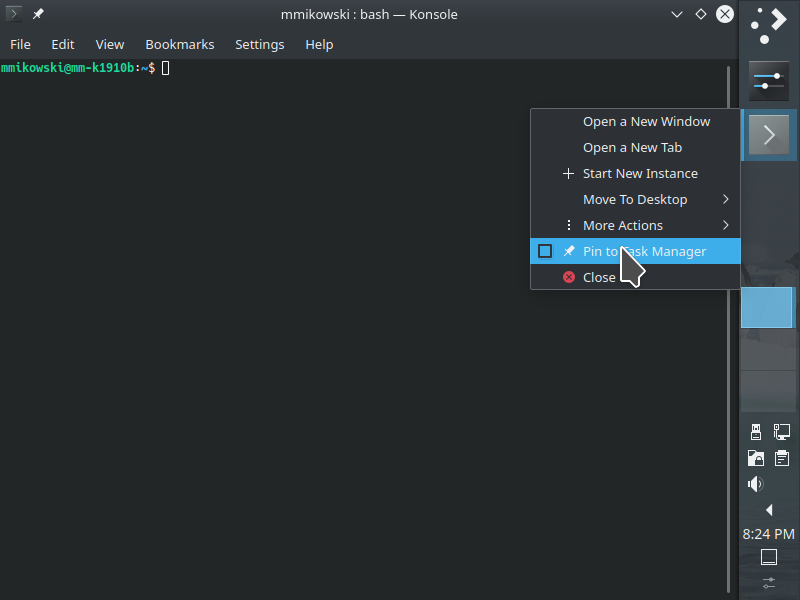
8.2. Pin Konsole to Panel
We use the terminal frequently.
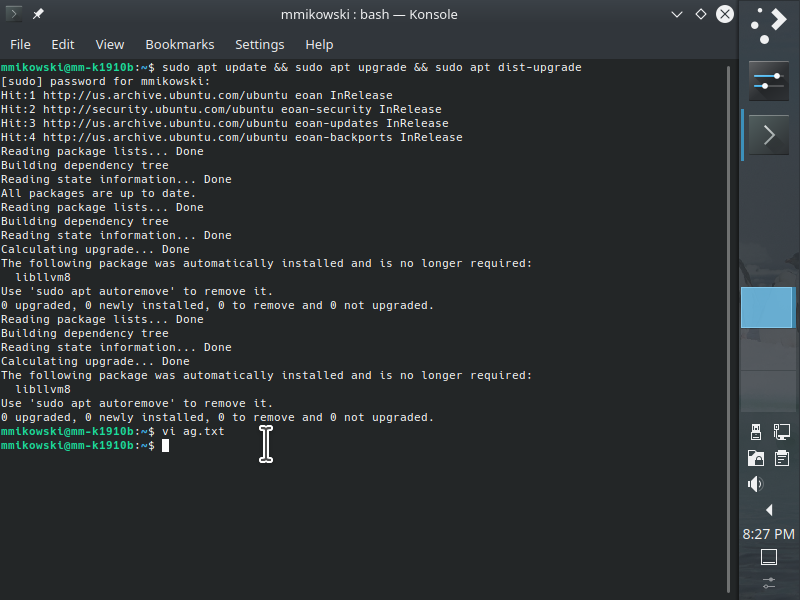
8.3. Update installed packages
Enter the following into the terminal to ensure all packages are current.
sudo apt update && sudo apt upgrade && sudo apt dist-upgrade
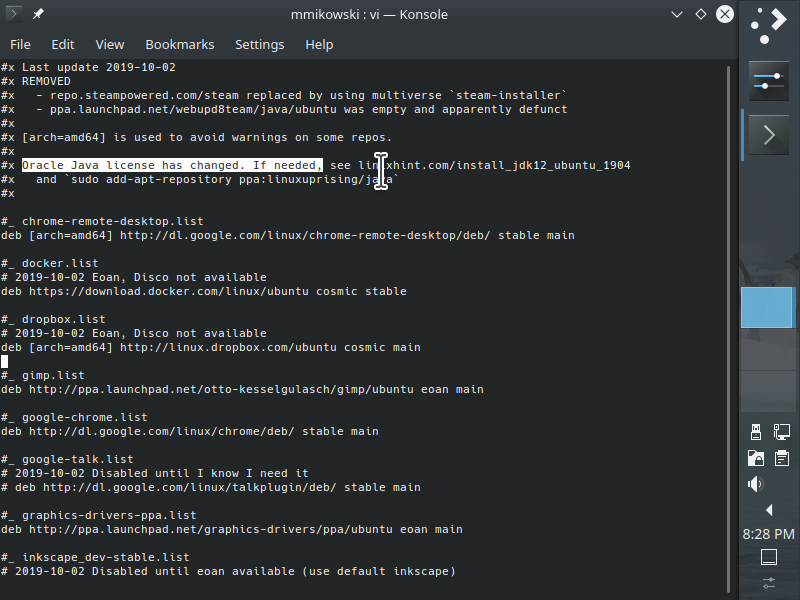
8.4. Add repo files
Enter the following into the terminal to generate the file ag.txt. Each repository file destined for /etc/apt/sources.list.d us marked by the #_ prefix. subsequent lines are placed in the file. Empty lines and those prefixed by #x are ignored.
echo '#x Last update 2019-11-02
#x REMOVED
#x   - repo.steampowered.com/steam; see multiverse `steam-installer`
#x   - ppa.launchpad.net/webupd8team/java/ubuntu; was empty and defunct
#x   - google talk plugin which is now deprecated in favor of hangouts
#x
#x [arch=amd64] is used to avoid warnings on some repos.
#x
#x Oracle Java license has changed. If needed, see
#x   linixhint.com/install_jdk12_ubuntu_1904
#x   and `sudo add-apt-repository ppa:linuxuprising/java`
#x

#_ chrome-remote-desktop.list
deb [arch=amd64] http://dl.google.com/linux/chrome-remote-desktop/deb stable main

#_ docker.list
# 2019-11-02 Eoan not yet available
deb [arch=amd64] https://download.docker.com/linux/ubuntu disco stable

#_ dropbox.list
# 2019-11-02 Eoan, Disco not available
deb [arch=amd64] http://linux.dropbox.com/ubuntu cosmic main

#_ gimp.list
deb http://ppa.launchpad.net/otto-kesselgulasch/gimp/ubuntu eoan main

#_ google-chrome.list
deb [arch=amd64] http://dl.google.com/linux/chrome/deb stable main

#_ graphics-drivers-ppa.list
deb http://ppa.launchpad.net/graphics-drivers/ppa/ubuntu eoan main

#_ inkscape_dev-stable.list
# 2019-11-02 Disabled until eoan available (use default inkscape)
# deb http://ppa.launchpad.net/inkscape.dev/stable/ubuntu eoan main

#_ insync.list
deb http://apt.insync.io/ubuntu eoan non-free contrib

#_ kubuntu-ppa-backports.list
deb http://ppa.launchpad.net/kubuntu-ppa/backports/ubuntu eoan main

#_ neovim-stable-ppa.list
# 2019-11-02 Enable if desired, Eoan not yet available
# deb http://ppa.launchpad.net/neovim-ppa/stable/ubuntu eoan main

#_ nodesource.list
deb https://deb.nodesource.com/node_10.x eoan main

#_ skype-stable.list
deb [arch=amd64] https://repo.skype.com/deb stable main

#_ slack.list
deb https://packagecloud.io/slacktechnologies/slack/debian jessie main

#_ stebbins-handbrake.list
# 2019-11-02 Eoan not yet available
# deb http://ppa.launchpad.net/stebbins/handbrake-releases/ubuntu eoan main

#_ teejee2008-ubuntu-ppa.list
# Provides TimeShift (see var/lib/apt/lists/, wajig detail timeshift)
#   which looks useful
deb http://ppa.launchpad.net/teejee2008/ppa/ubuntu eoan main
' > ~/ag.txt
8.5. Install repositories
Enter the following into the terminal to convert ~/ag.txt to repository definitions.
_tgt_dir="/etc/apt/sources.list.d";
_bkp_dir="${_tgt_dir}.O";
_tmp_dir="/tmp/sources.list.d";

if ( sudo mv "${_tgt_dir}" "${_bkp_dir}" ); then
  echo "Installing repository files to ${_tgt_dir}";
  sudo mkdir /etc/apt/sources.list.d;
  pushd /etc/apt/sources.list.d > /dev/null;
  grep -Ev '^#x|^\s*$' ~/ag.txt | while read _line; do
    if ( echo "${_line}" | grep -q '^#_' );
      then
        _tgt_file=$(echo "${_line}"|cut -f2 -d' ');
        echo; echo "CREATE ${_tgt_file}";
      else
        echo "${_line}" | sudo tee -a "${_tgt_file}";
    fi;
  done;
  popd > /dev/null;
else
  echo "Could not move ${_tgt_dir} ${_bkp_dir}. Please try running";
  echo "  'sudo rm -rf ${_tmp_dir} && sudo mv ${_bkp_dir} ${_tmp_dir}'";
  echo "  and then reattempt this action.";
fi
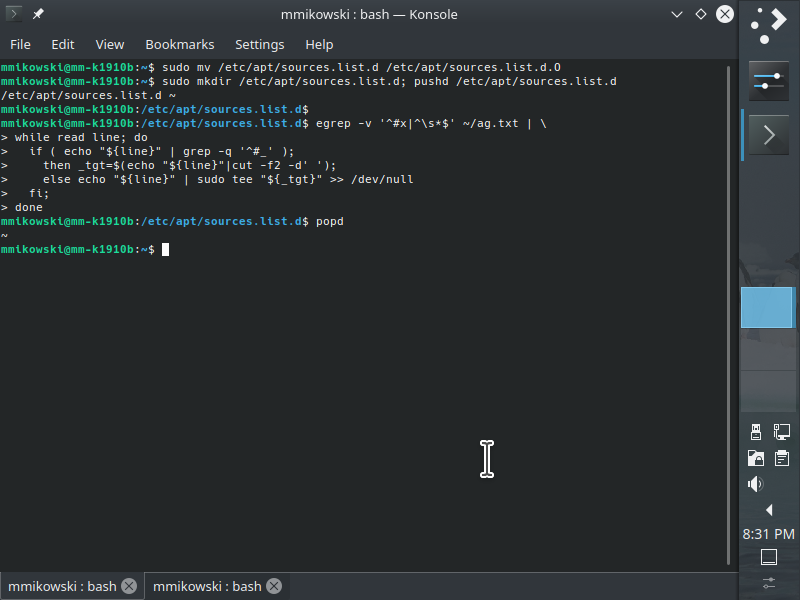
8.6. Update repository keys
Enter the following into the terminal to install all the keys for the repositories we just added.
sudo ls >/dev/null && if [ 1 ]; then
  sudo apt update 2>&1 | grep NO_PUBKEY | sed -e 's?^.*NO_PUBKEY ??' \
  | while read _hash; do
      wget -O- "http://keyserver.ubuntu.com/pks/lookup?op=get&search=0x${_hash}" \
        | sudo apt-key add -;
  done
fi
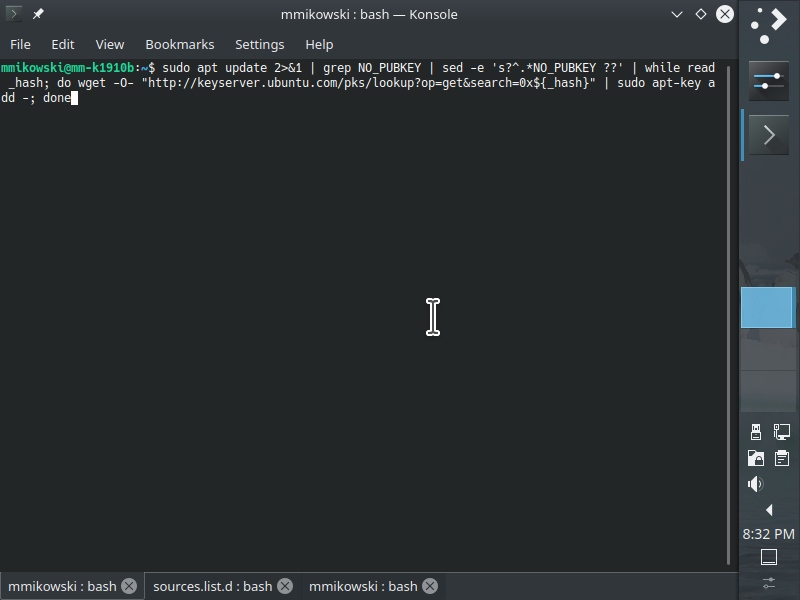
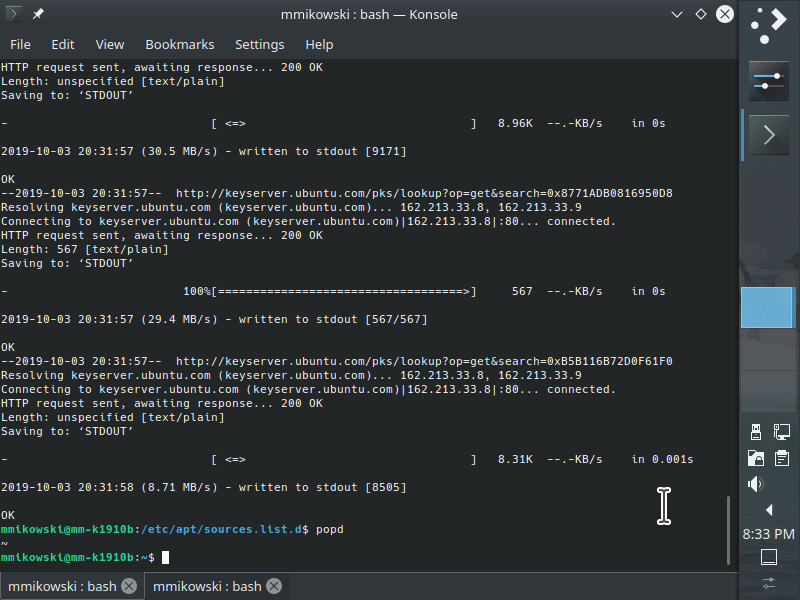
8.7. Generate ssh keys
Enter the following to create an SSH RSA key. This is required for gitolite3 configuration. When prompted to enter a passphrase, press <enter> both times.
mkdir .ssh;
chmod 700 .ssh;
ssh-keygen -t rsa;
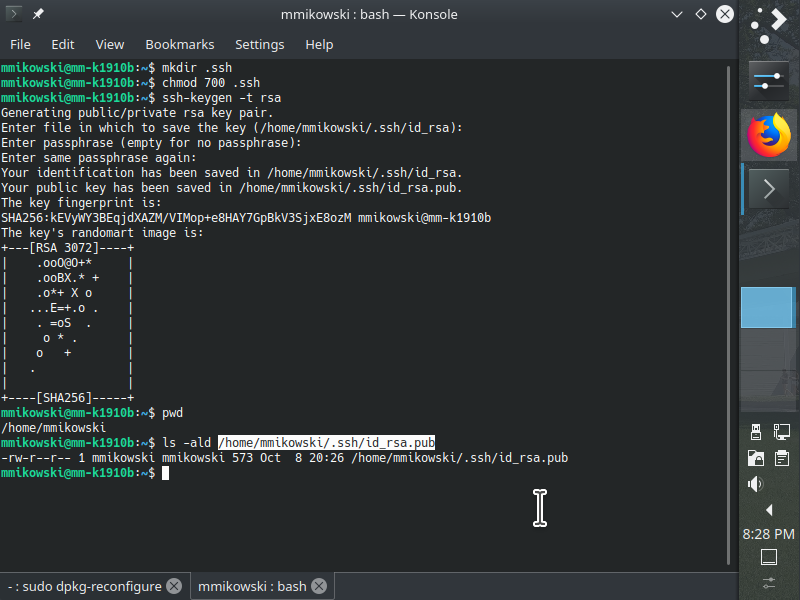
8.8. Install repo packages
8.8.1. Update packages
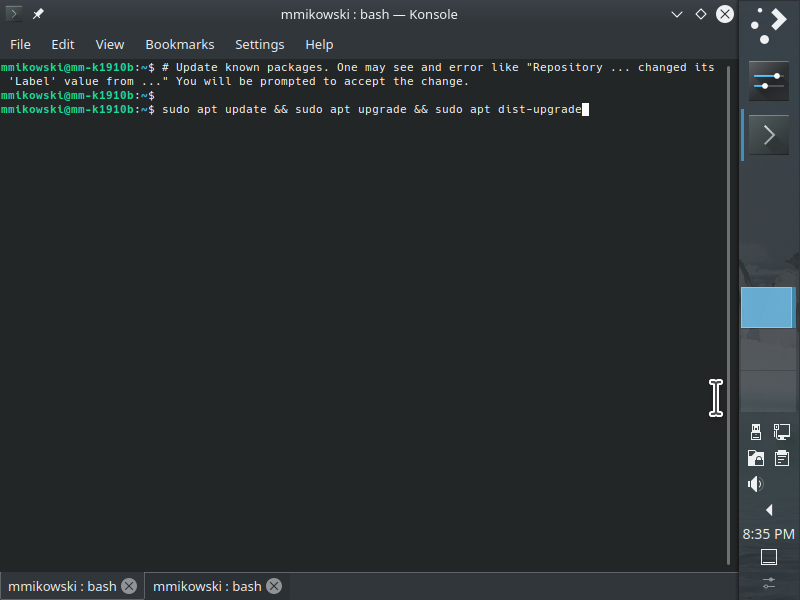
Enter the following into the terminal to ensure all packages are current.
sudo apt update && sudo apt -y upgrade && sudo apt -y dist-upgrade
There will be upgrades as we have enabled repos that provide newer versions of software.
8.8.2. Install apps
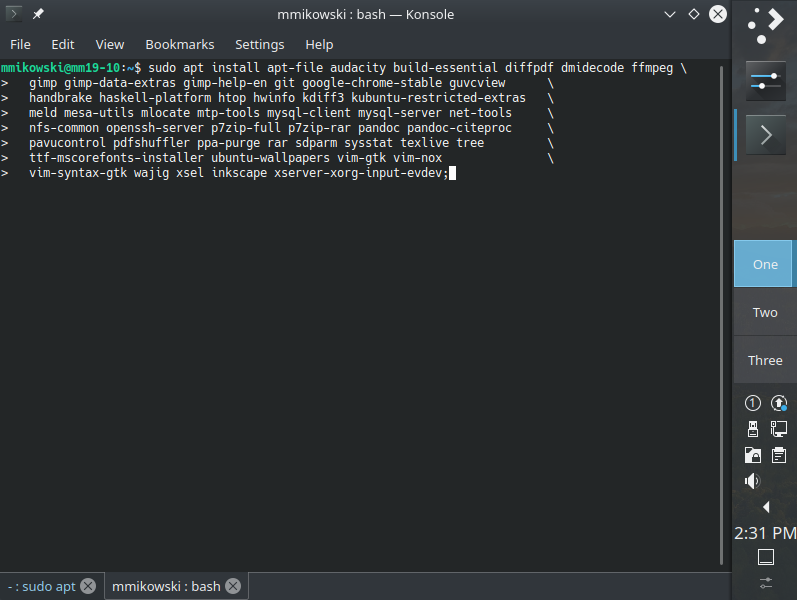
Enter the following into the terminal to install most of the apps specified in the Selected Apps table.
sudo apt install \
  apt-file audacity awscli build-essential clementine diffpdf dmidecode      \
  ffmpeg gimp gimp-data-extras gimp-help-en git gitolite3                    \
  google-chrome-stable guvcview handbrake haskell-platform htop hwinfo       \
  inkscape kdenlive kdiff3 kruler kubuntu-restricted-extras meld mesa-utils  \
  mlocate mtp-tools mariadb-client mariadb-server net-tools nfs-common       \
  openssh-server p7zip-full p7zip-rar pandoc pandoc-citeproc pavucontrol     \
  pdfshuffler ppa-purge rar sdparm steam-installer sqlite sysstat texlive    \
  tree ttf-mscorefonts-installer ubuntu-wallpapers vdpau-driver-all          \
  vdpauinfo vim-gtk vim-nox vim-syntax-gtk wajig xsel                        \
  xserver-xorg-input-evdev;
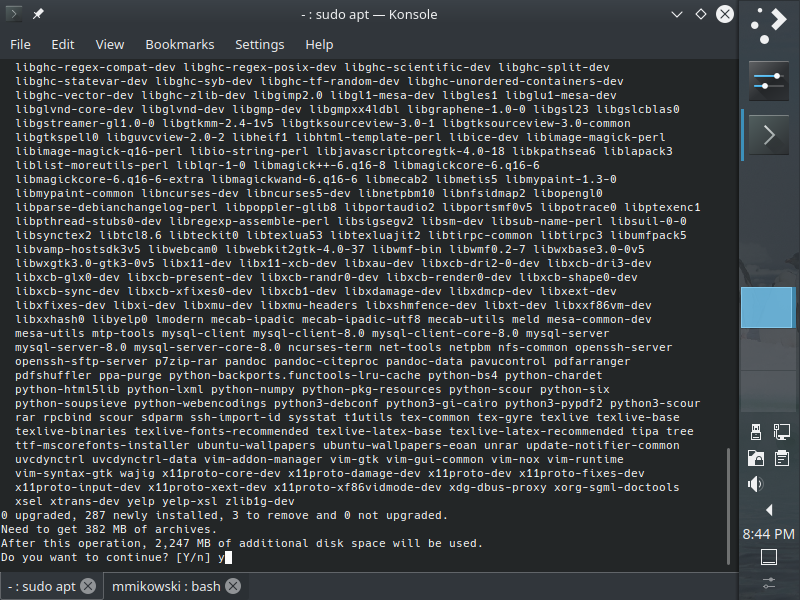
8.8.3. Confirm install
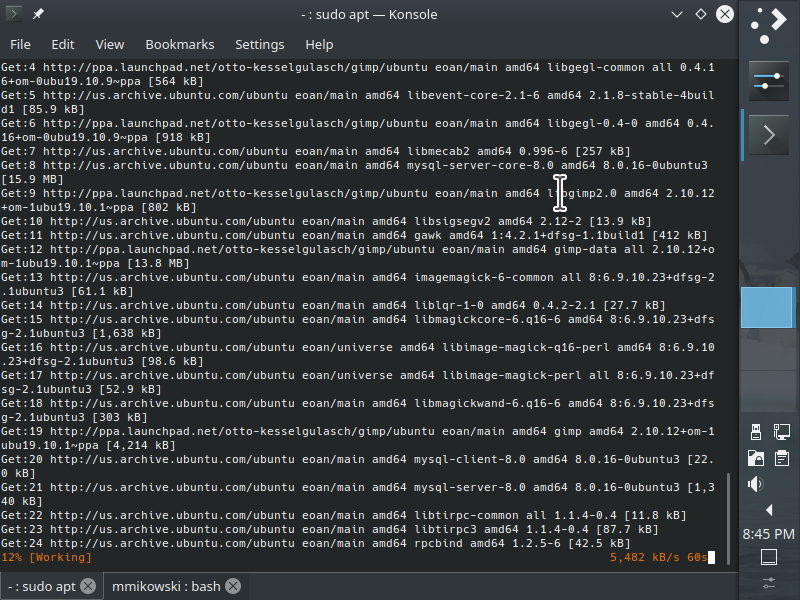
8.8.4. Download apps
Installation takes 5-10 minutes.
8.8.5. Approve font install
After downloads some packages require the admin to assist in configuration. The MS Font install requires approvals as shown. Press <tab> or the arrow keys to select <OK> and then press <return>. Use the same technique to select and accept <Yes> on the next screen.
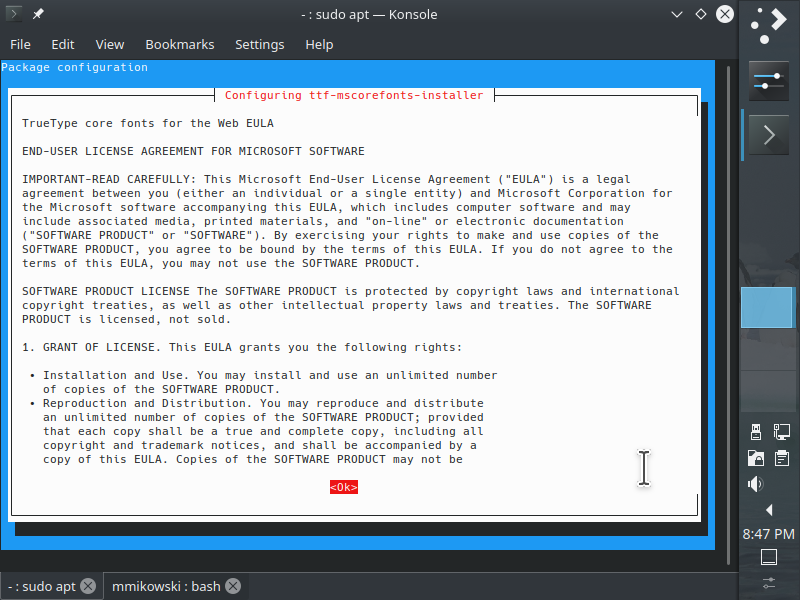
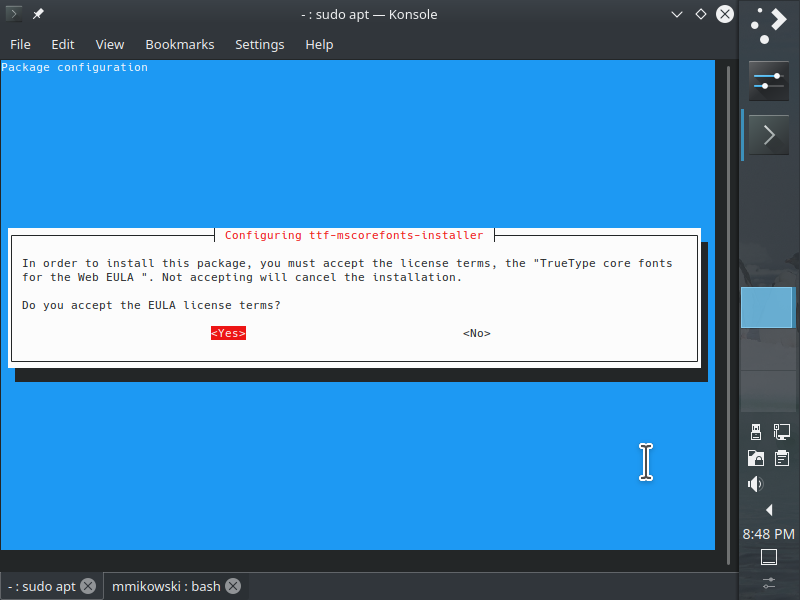
8.8.6. Configure Gitolite3
After downloads some packages require the admin to assist in configuration. GitoLite3 requests the id_rsa.pub file generated earlier. Navigate the page using <tab> or arrow keys as discussed above.
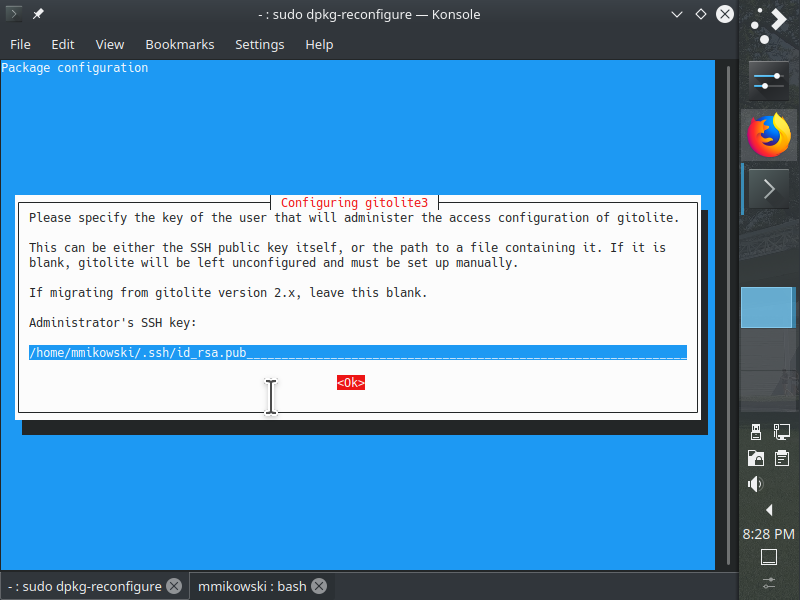
If the install completes without asking to configure gitolite, use sudo dpkg-reconfigure gitolite3 to configure. Accept the defaults, but set the pub key to /home/<username>/.ssh/id_rsa.pub which we created earlier.
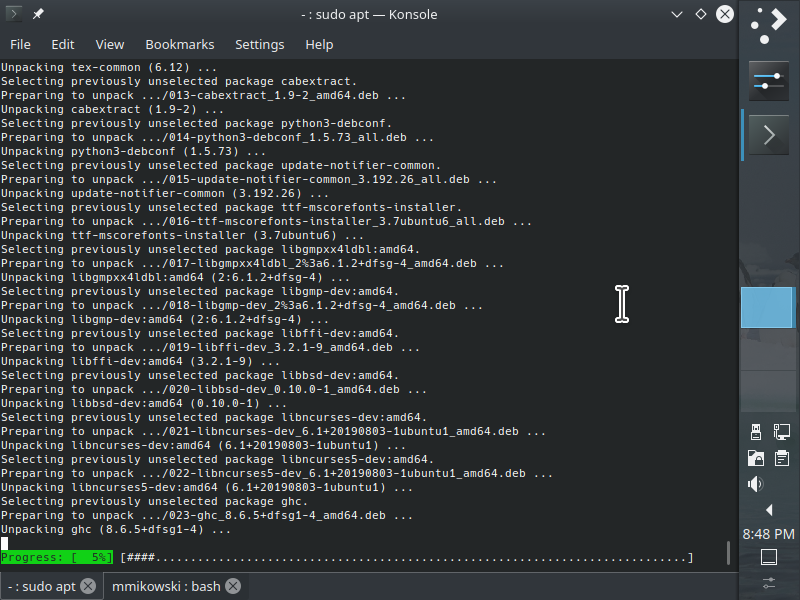
8.8.6. Watch installation progress
Packages installation progress is as shown.
8.9. Reboot after installation
Reboot the system once all packages are installed. Click on K-menu > Leave > Restart.
9. Configure Plasma (top)
Warning the images in this section our out of date due to recent Plasma updates (2019-11-02). These will be updated. Until then, be aware that the to some screens and other details may differ from the instructions which are accurate and up to date.
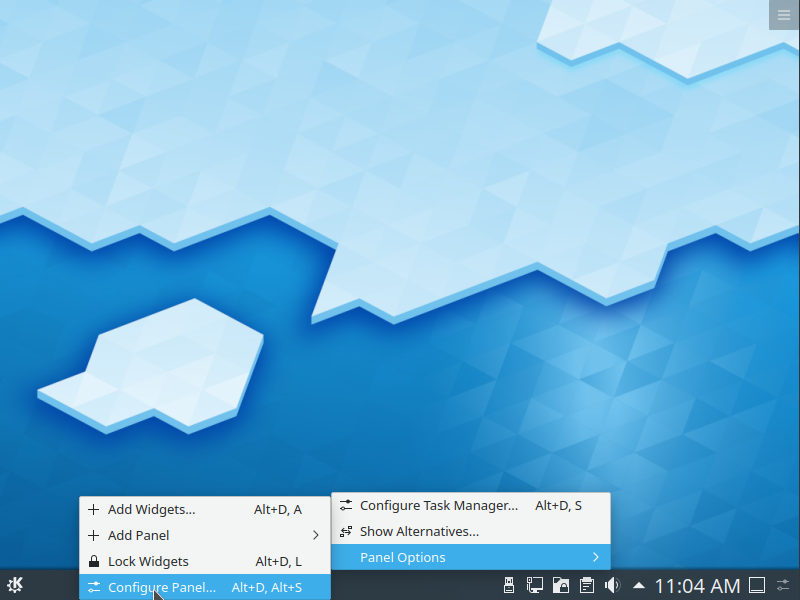
9.1. Configure panel
We prefer the panel on the right side to maximize vertical space. Right click on the panel and select Panel Options > Configure Panel
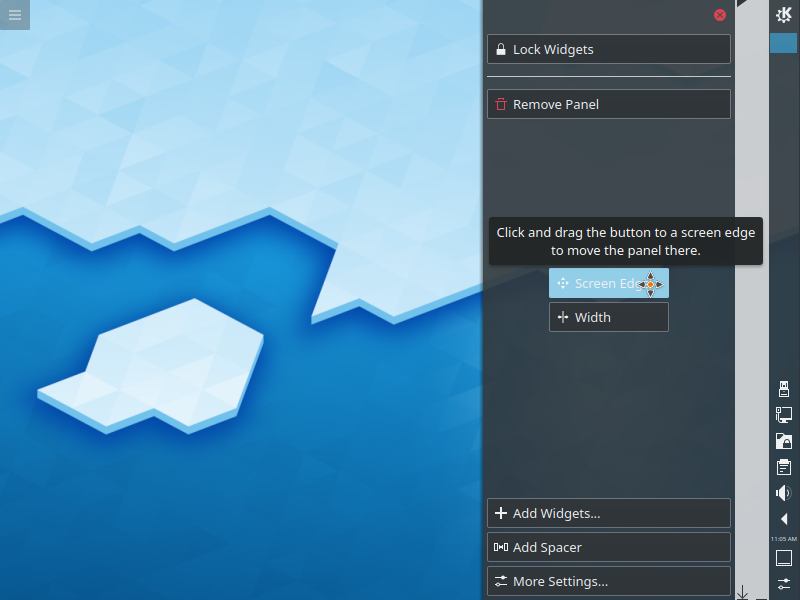
9.2. Move panel to right edge
Click on the screen edge button to move the panel.
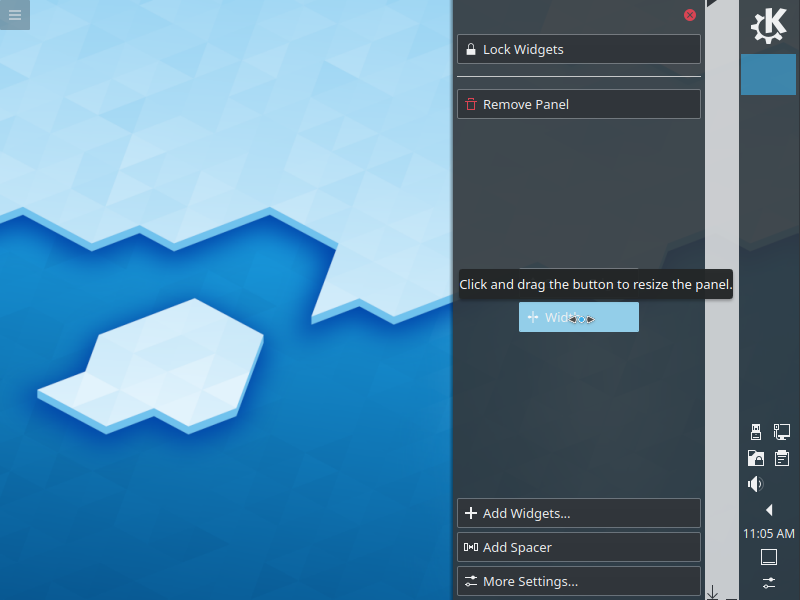
9.3. Widen the panel
Widen the panel a bit to allow columns rows in the system tray at the bottom.
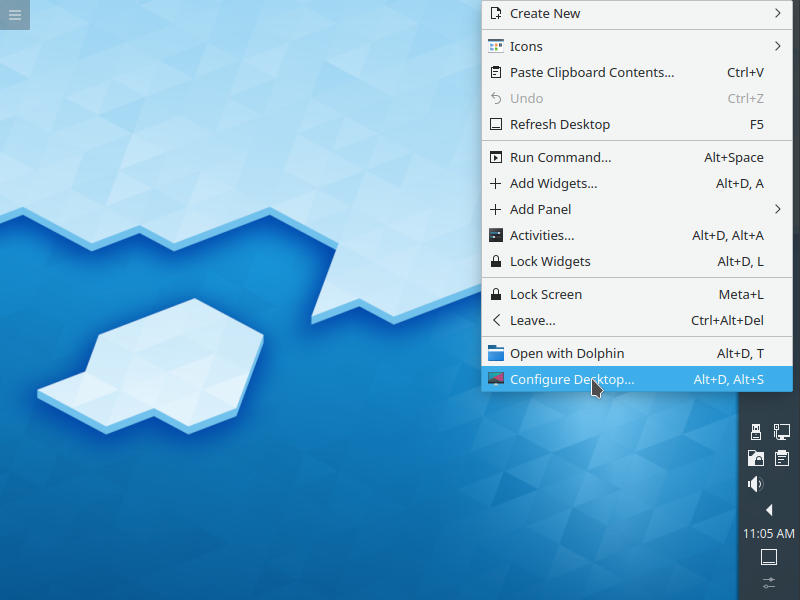
9.4. Configure desktop
Right-click on the desktop and select Configure Desktop
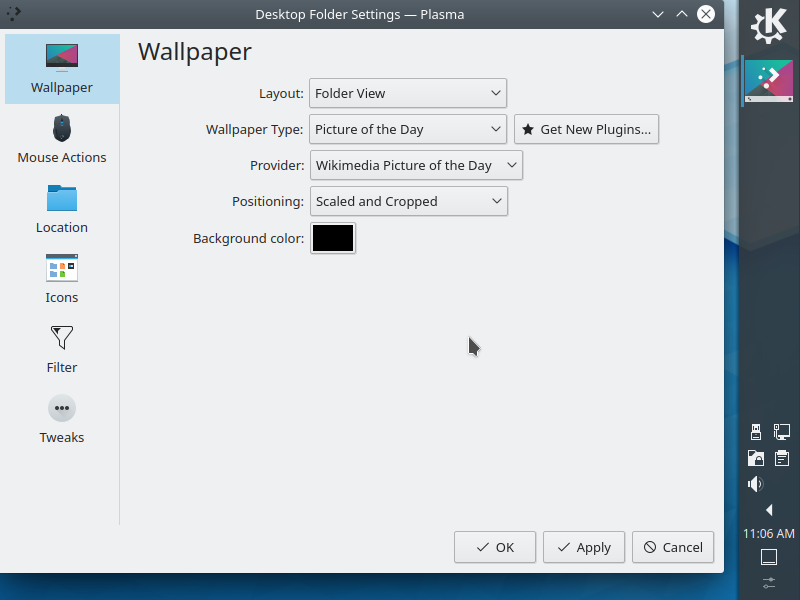
9.5. Change background
We like the picture of the day. Adjust as desired
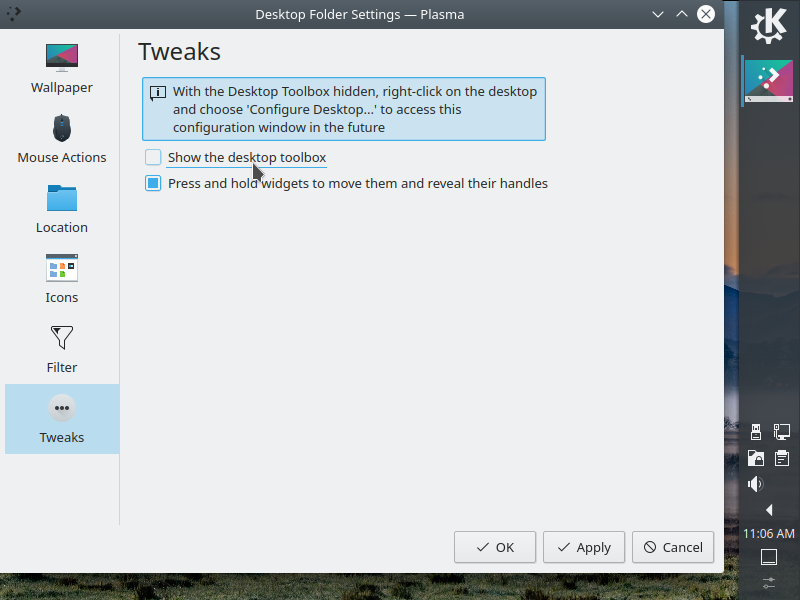
9.6. Hide toolbox
The toolbox can get in the way. After hiding, click OK.
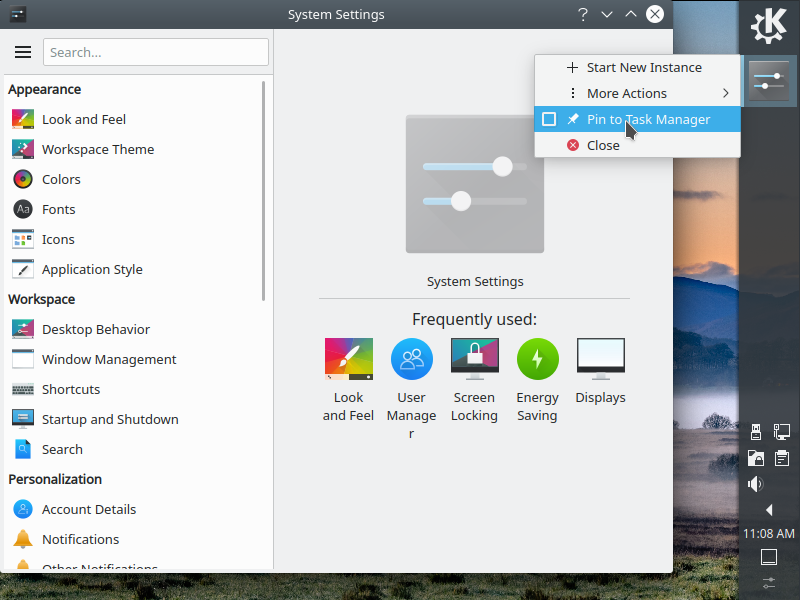
9.7. Open system settings
Open system settings from the K menu and then pin to the task manager.
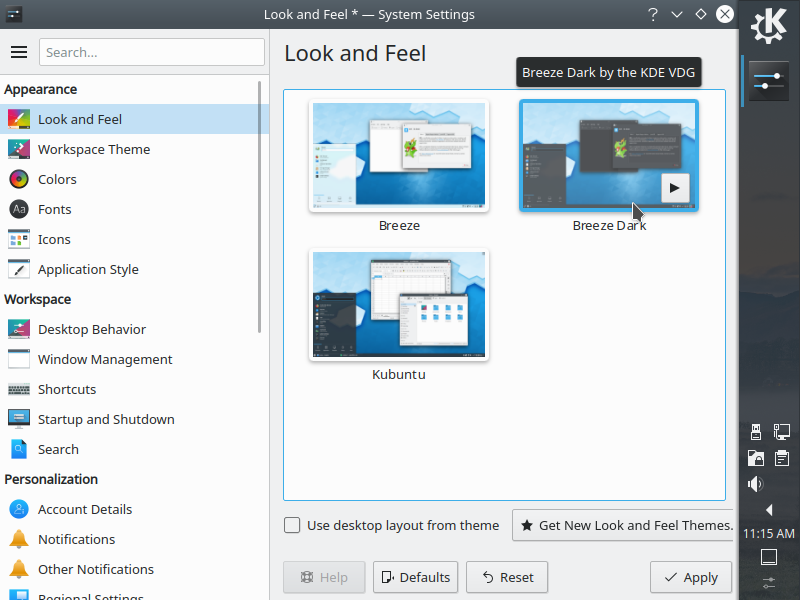
9.8. Change theme
System Settings > Global Theme
Select Breeze Dark theme.
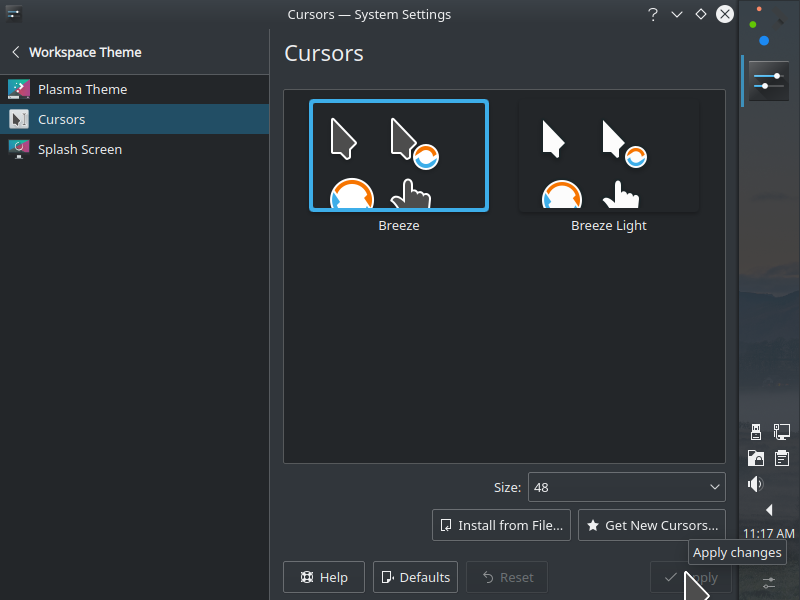
9.9. Change cursor size
System Settings > Cursors
We prefer larger cursors for demonstration purposes. Change this in the Size field.
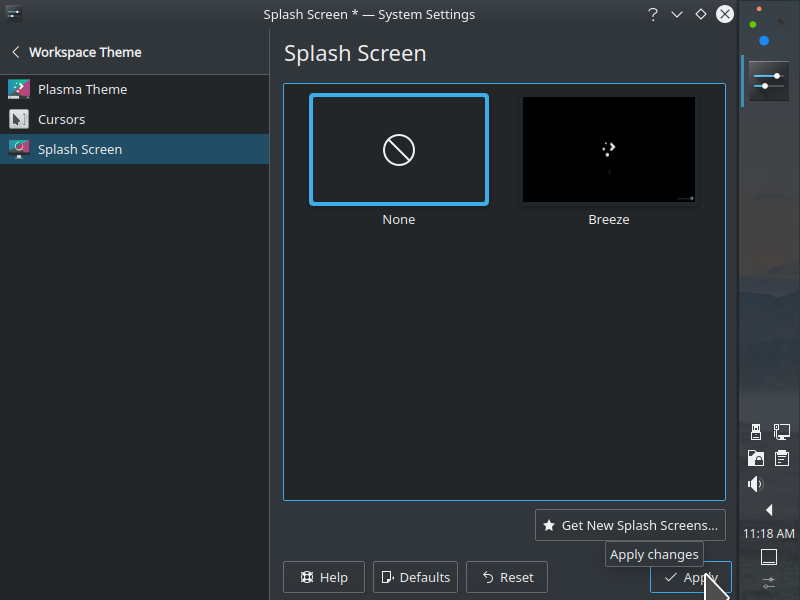
9.10. Disable splash screen
System Settings > Startup and Shutdown > Splash Screen
The splash screen only shows for a second or so on modern hardware. Disabling removes visual noise.
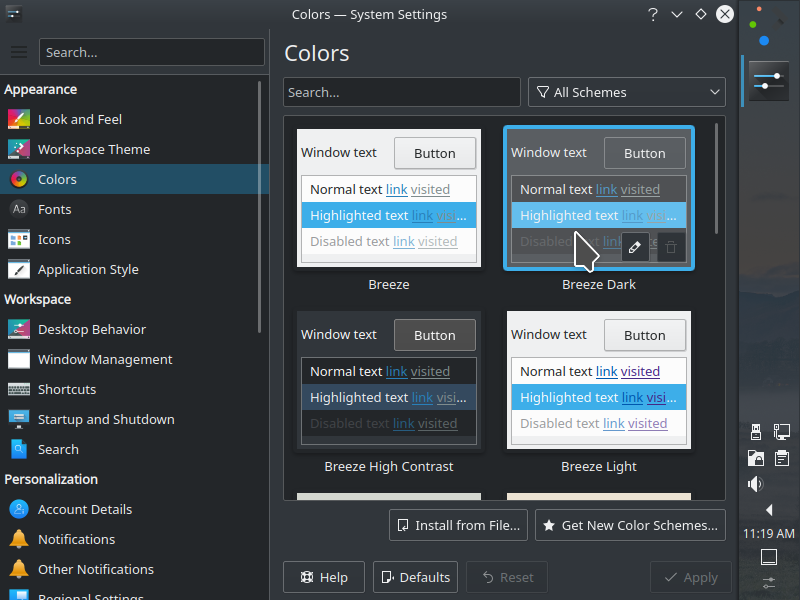
9.11. Set Colors
System Settings > Colors
This should already be set to Breeze Dark.
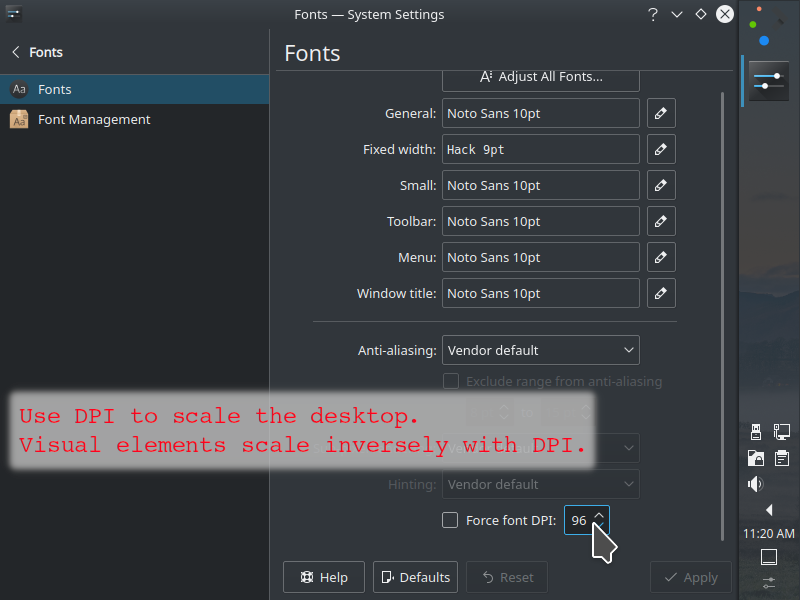
9.12. Set Fonts
System Settings > Fonts
Those with 4K monitors may wish to scale their interface. The best method we have found is to adjust the DPI value under fonts and leave System Settings > Displays > Scale Display alone.
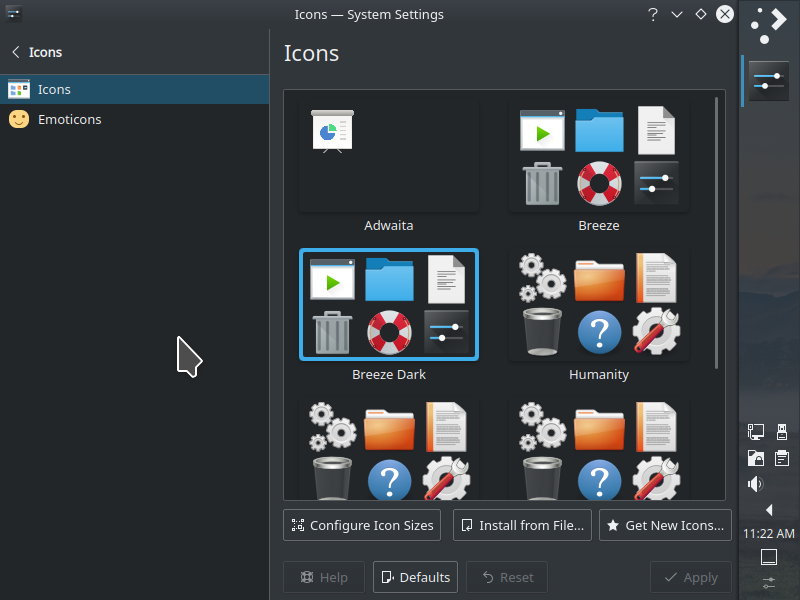
9.13. Set Icons
System Settings > Icons
This should already be set to Breeze Dark.
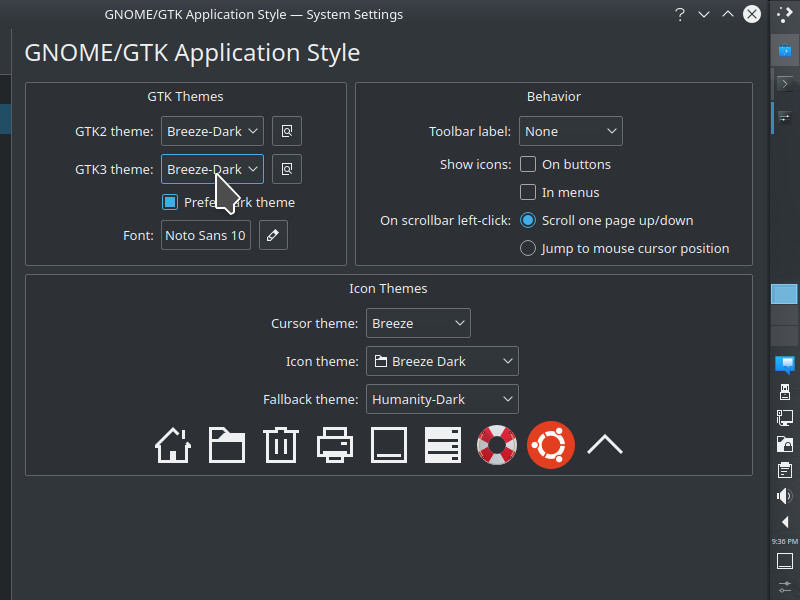
9.14. Set GTK style
System Settings > Application Style > GNOME/GTK Application Style.
Set the GTK2 and GTK3 themes to Breeze-Dark. Also select Prefer dark theme. Choose Breeze Dark for the icon theme as well. This is required to ensure GTK apps such as Firefox, Chrome, and LibreOffice use a dark theme.
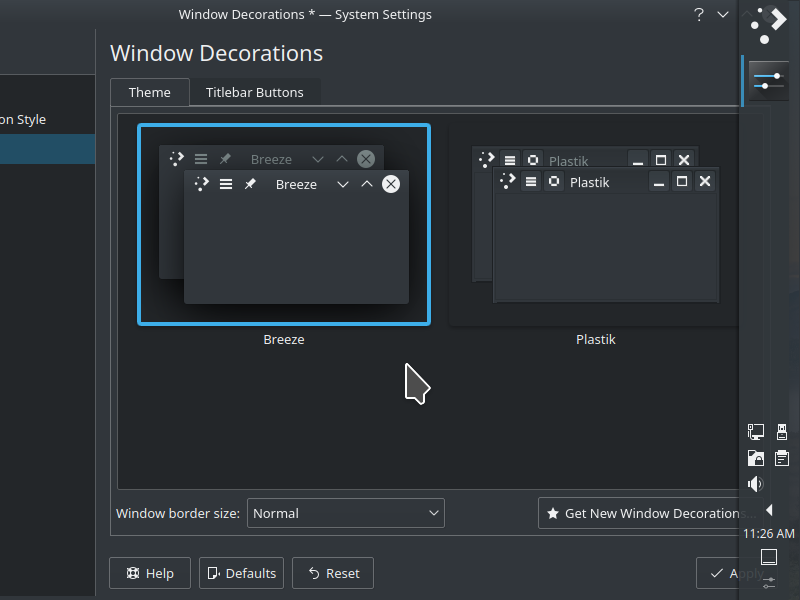
9.15. Set Window Decorations
System Settings > Application Style > Window Decorations
This should already be set to Breeze. We recommend adjusting
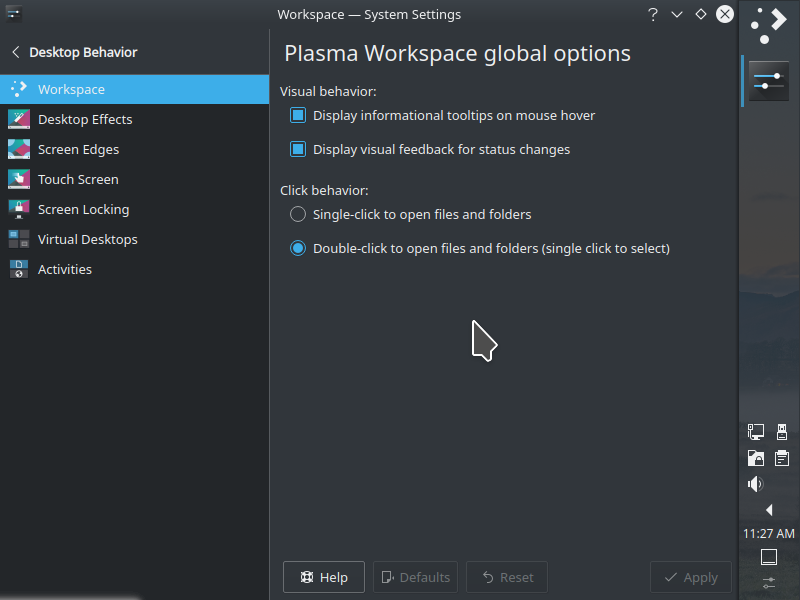
9.16. Use Workspace defaults
System Settings > Workspace Behavior > General Behavior
Use workspace default settings as shown.
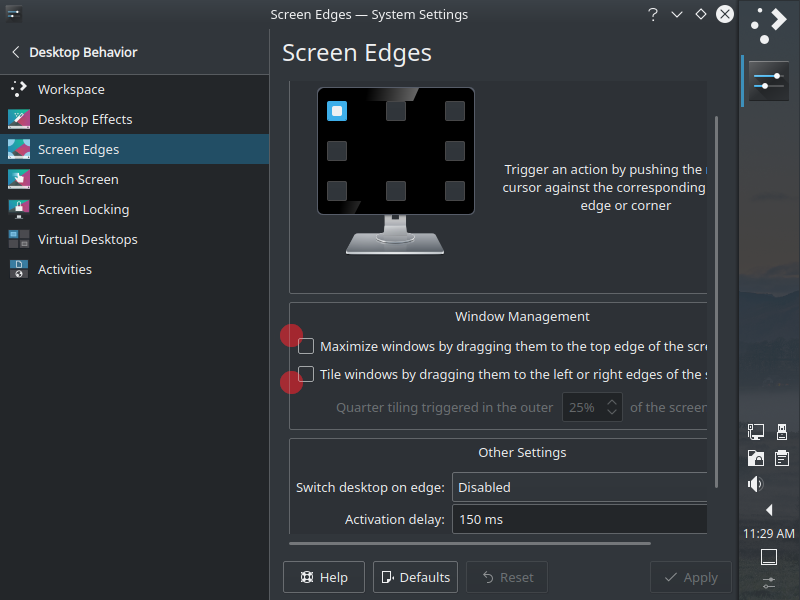
9.17. Adjust window edges
System Settings > Workspace Behavior > Screen Edges
Turn off maximize features. Instead, prefer to use <meta + leftarrow> or <meta + rightarrow> to tile windows. One can also click with the middle or right mouse button on the maximize-window control to toggle a window vertically or horizontally.
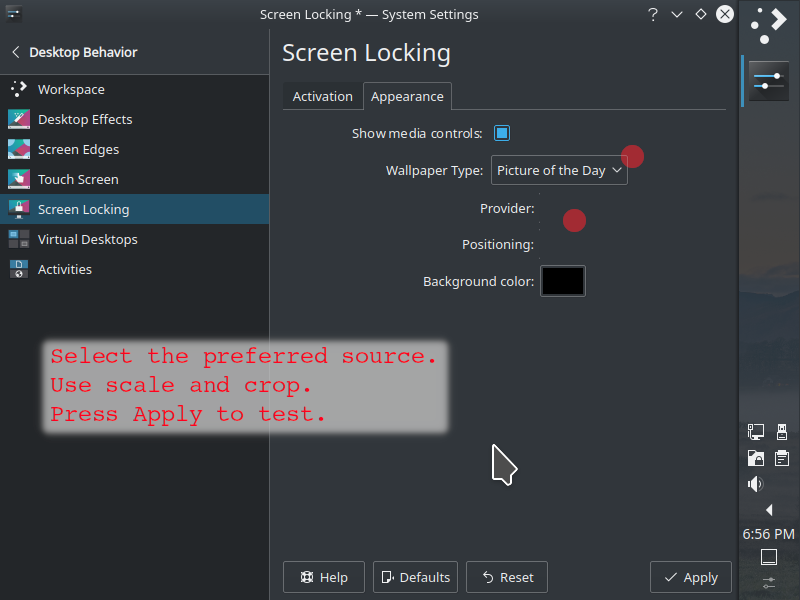
9.18. Set screen lock
System Settings > Workspace Behavior > Screen Locking
Click on the Appearance tab inn top middle and set the background to match the desktop.
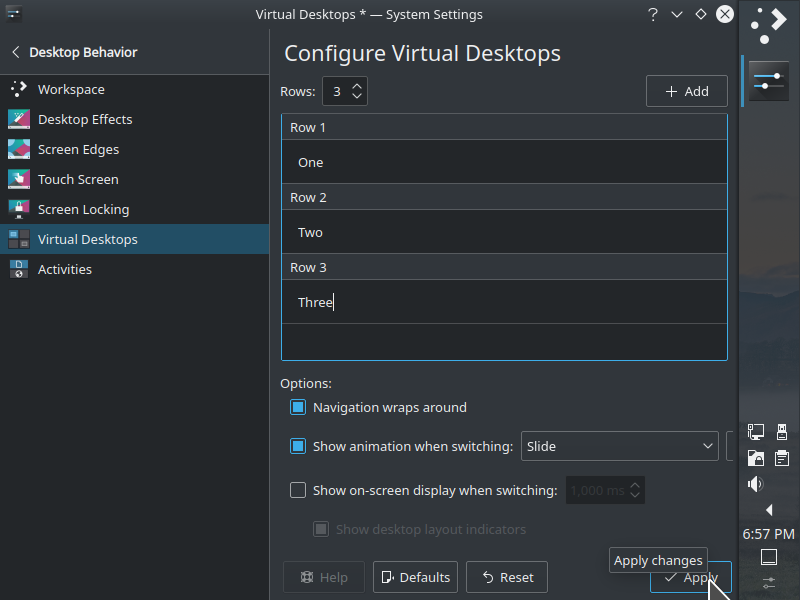
9.19. Add virtual desktops
System Settings > Workspace Behavior > Virtual Desktops
Add four rows and rename as desired. Use slide animation and wrap-around navigation.
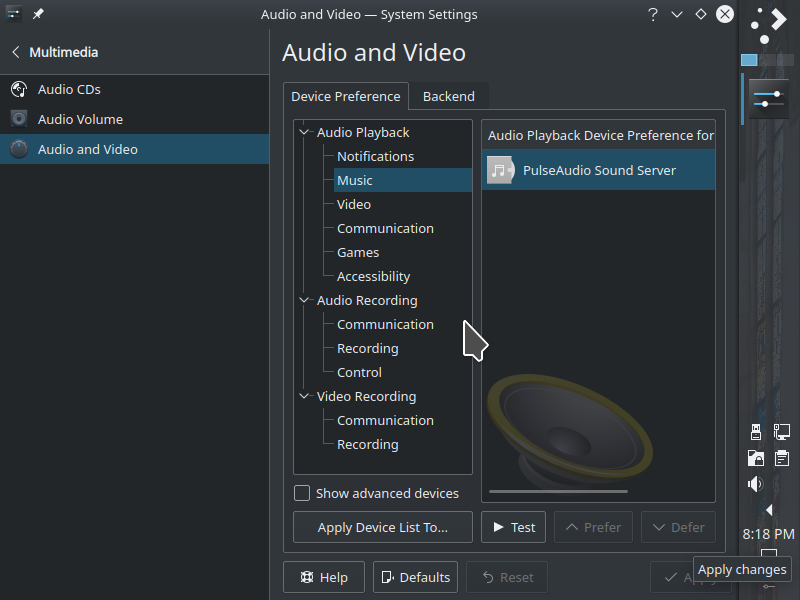
9.20. Test sound
System Settings > Audio
Click on the Advanced tab and click on Front Left and Front Right buttons to test audio output.
9.21. Configure pager
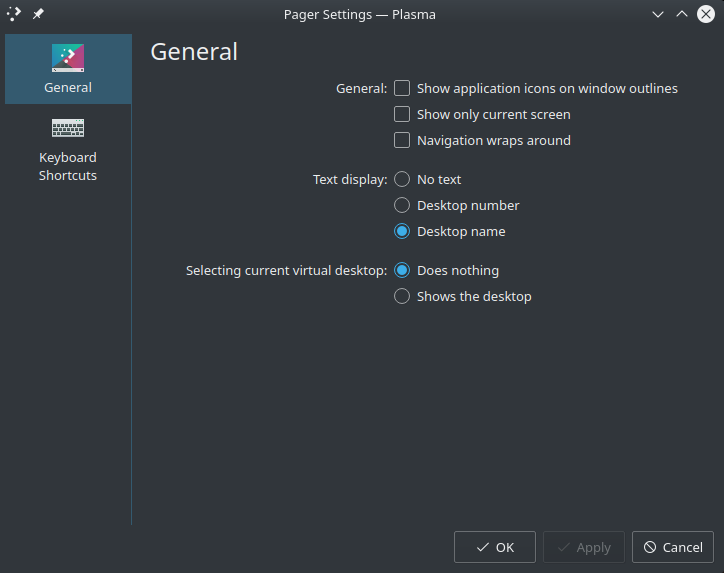
Close system settings. Right click on the virtual desktops in the panel and select Configure Pager. Click to display the desktop name.
9.22. Move pager widget
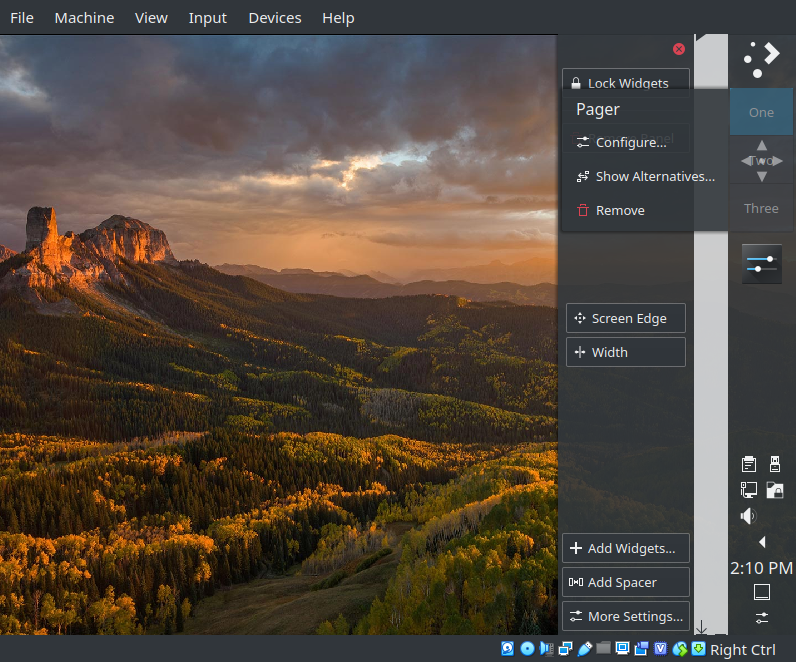
Right click on the panel and select Panel Options > Configure Panel and then drag the pager widget (which shows the virtual desktops) down to just above the system tray.
9.23. Review the results
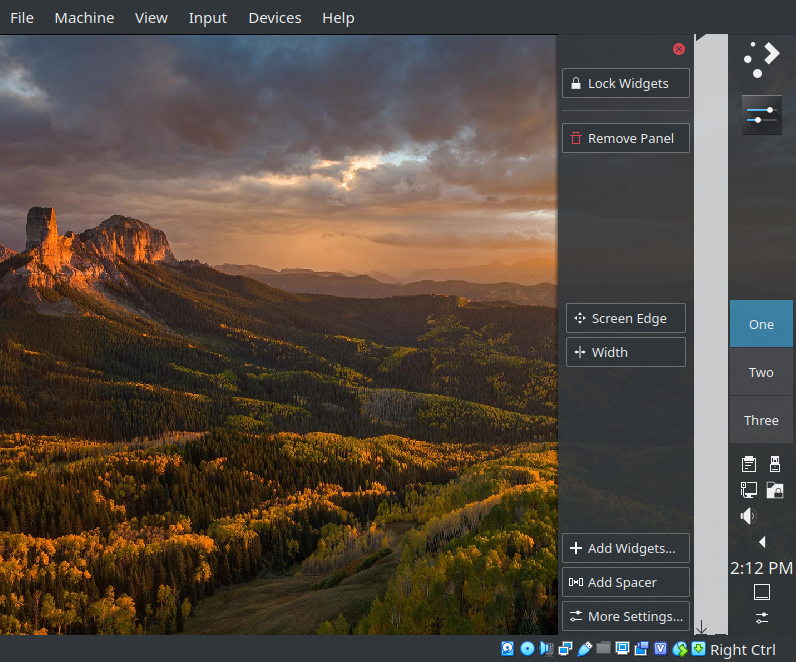
The pager is now just above the system tray.
10. Install Addon Apps (top)
10.1. Docker
Enter the following into the terminal to install Docker. The required repo already added in Add Repos and Install.
sudo apt -y install docker-ce
10.2. Dropbox
Enter the following into the terminal to install Dropbox and start the service. The required repo already added in Add Repos and Install.
sudo apt install -y dropbox && dropbox start -i
Agree to install and start the dropbox daemon. After the daemon is installed, a browser window opens prompting the user to authorize the Dropbox folder. Enter the username and password to attach a Dropbox account or create an account if needed.
10.3. Balsamiq
Baslamiq is not a repo install and requires a bit more work. This site showed us the way.
10.3.1. Install wine packages
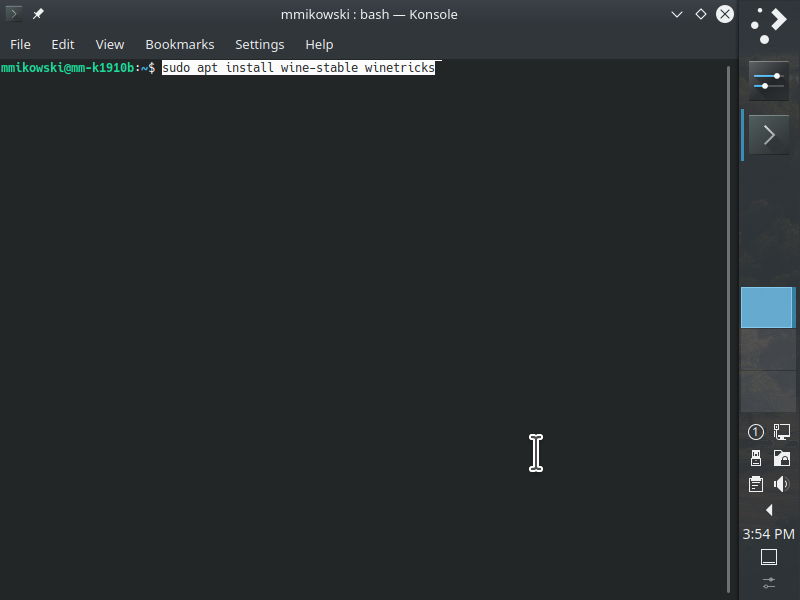
Enter the following into the terminal to install wine with a boatload of i386 packages. Wait for the installation to complete before proceeding.
sudo apt install -y wine-stable winetricks
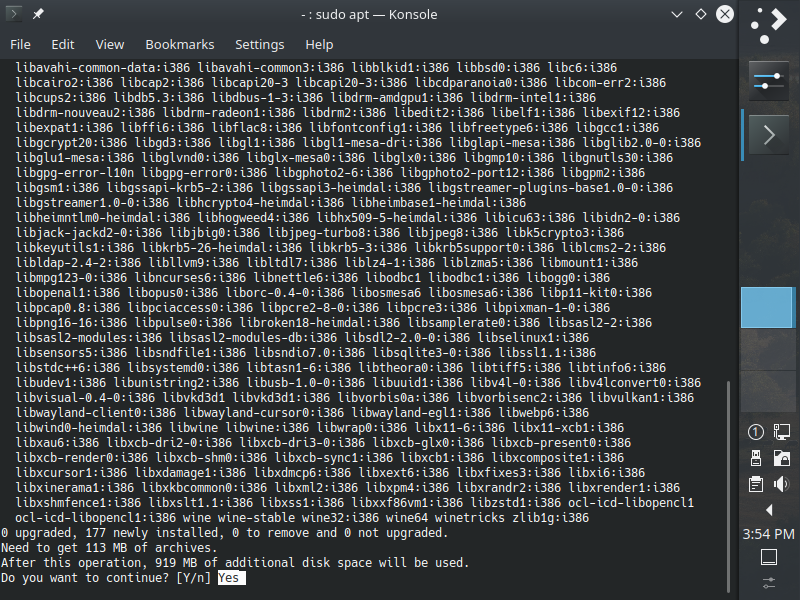
10.3.2. Download Balsamiq Bundle
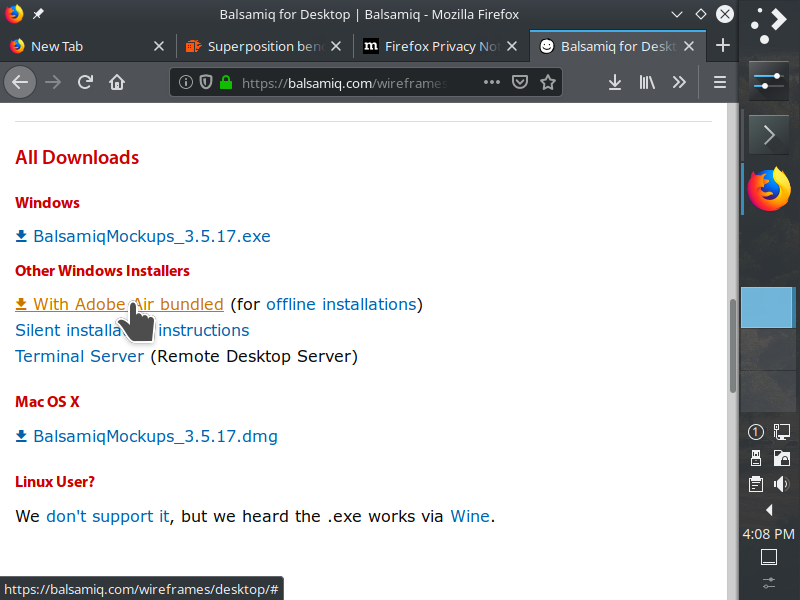
Download Adobe Air from the Balsamiq Site by clicking the link With Adobe Air bundled under the section Other Windows Installers. If prompted to agree to the Balsamiq terms of use, Click I Agree to continue. A zip file should be downloaded.
10.3.4. Install to /usr/local/lib
Enter the the following in a terminal to install Balsmiq into /usr/local/lib Beware that we may need to change names and links if the downloaded file changes. For example, if the download file is updated to verion 3.5.18, we should use baslamiq_3_5_18 for our symbolic link and update the source filename as well.
_src='Balsamiq_Mockups_3.5.17_bundled.zip';
_tgt='balsamiq_3_5_17';
_dir='Balsamiq_Mockups_3';
_result='';
sudo ls >/dev/null && if [ 1 ]; then
  pushd /usr/local/lib;
  sudo /bin/rm -rf "${_dir}";
  if ( sudo unzip ~/Downloads/"${_src}" ); then
    sudo ln -s "${_dir}" "${_tgt}";
    sudo ln -s "${_dir}" balsamiq
    pushd /usr/local/lib/balsamiq
    sudo ln -s 'Balsamiq Mockups 3.exe' balsamiq.exe
    _result='SUCCESS: Balsamiq installed and links configured';
    popd;
  else
    _result='FAIL: Balsamiq install, could not unbundle';
  fi
  popd;
else
  _result='FAIL: Balsamiq install, no sudo rights';
fi
echo "${_result}";
10.3.5. Add desktop file
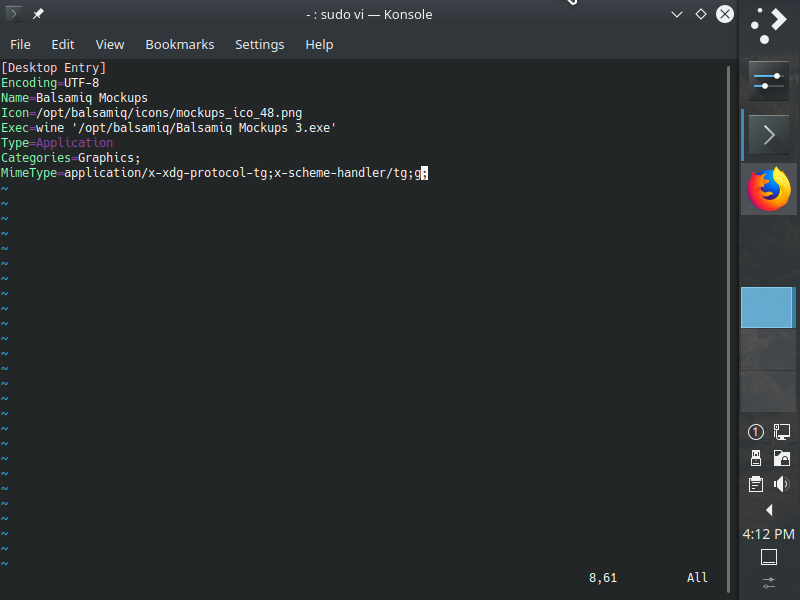
Enter the following into the terminal to install a desktop file so one can easily access the app from the K-menu. We use symbolic links for references so we should not need to update this file.
echo '[Desktop Entry]
Encoding=UTF-8
Name=Balsamiq Mockups
Icon=/usr/local/lib/balsamiq/icons/mockups_ico_48.png
Exec=wine '/usr/local/lib/balsamiq/Balsamiq Mockups 3.exe'
Type=Application
Categories=Graphics;
MimeType=application/x-xdg-protocol-tg;x-scheme-handler/tg;g;' \
  | sudo tee /usr/share/applications/balsamiq.desktop
10.3.6. Start Balsamiq
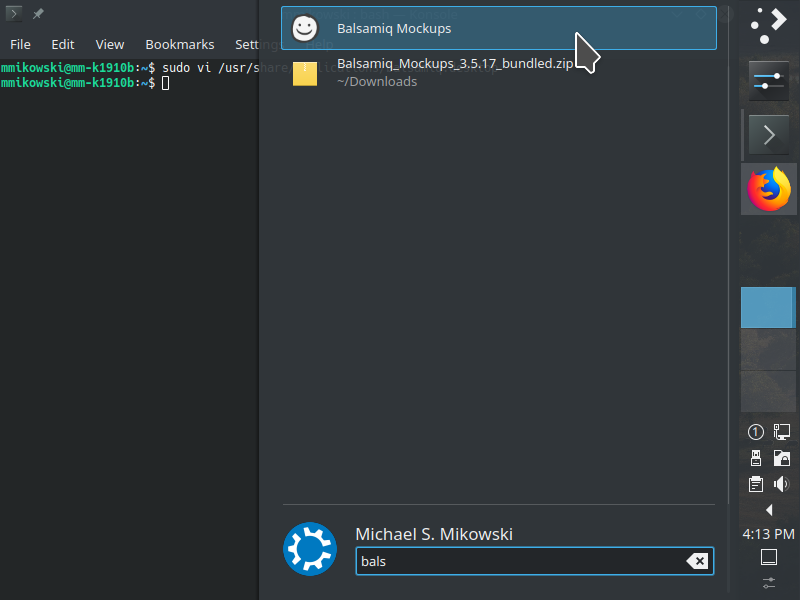
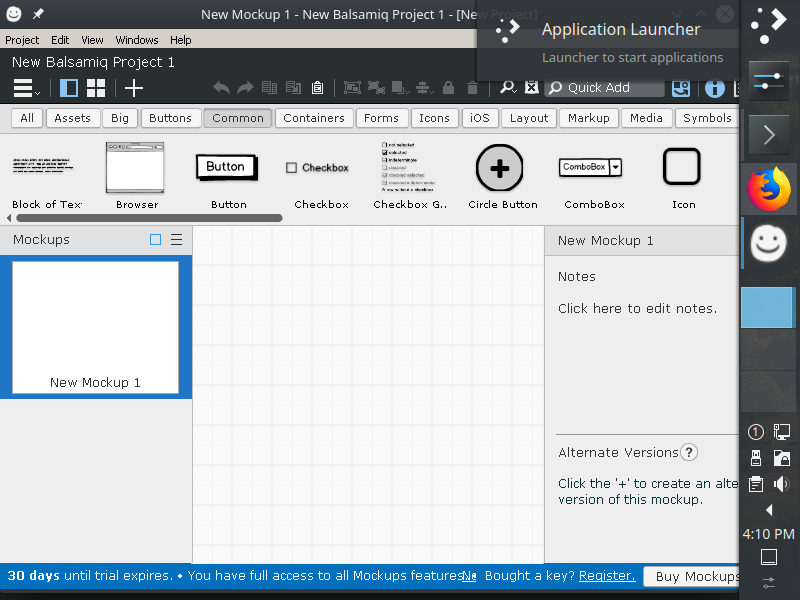
After wine installation is complete, Start Balsamiq with the K-menu (shown); or by typing <alt + space> followed by bals and then pressing <enter>; or by typing balsamiq followed by <enter> in the terminal.
10.4. IntelliJ
10.4.1. Download IntelliJ Ultimate
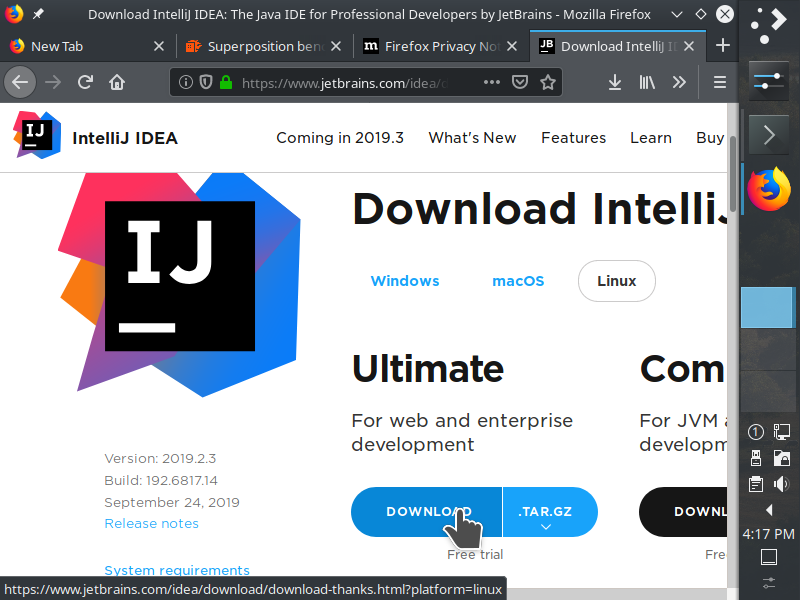
IntelliJ Ultimate is a great productivity tool in our experience. A free 30 trial is provided, and an individual license is $149 a year. For us, it is much worth it. Other Jetbains options include Webstorm, Pycharm, Rubymine, and others. We might consider Komodo IDE , Eclipse, KDevelop, or others, but we do not have recent experience with them. Download from the JetBrains website.
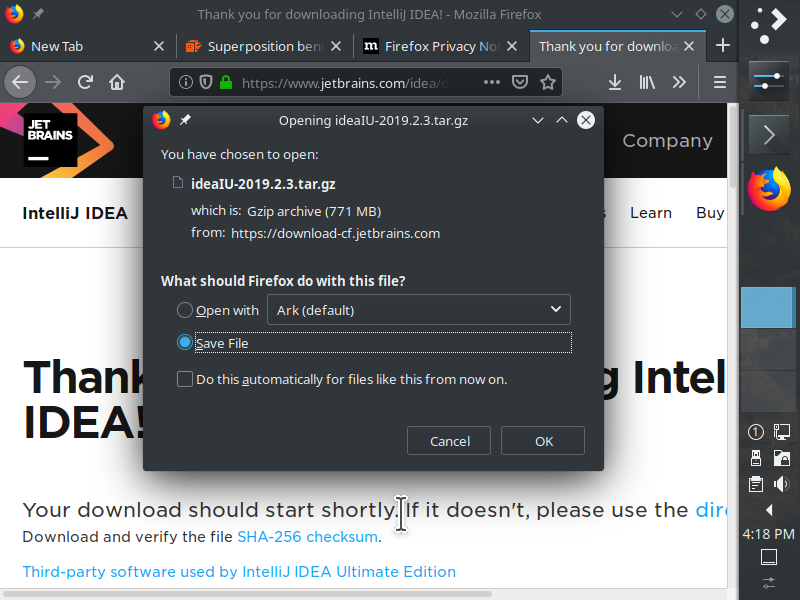
Save the download as file.
Enter the following into the terminal to ensure the SHA256 checksum matches the one provided by JetBrains (click on the SHA256 link). The checksum will change as the package is updated, so please modify the _hash='...' line accordingly.
# Change this hash with value provided from JetBrains
pushd ~/Downloads
_hash='102a925396f2edd5d67b823fe14f3547e3d109c2a63a313c81fa2185cf8b98a1' \
&& if ( sha256sum ideaIU-2019.2.4.tar.gz |grep -v "${_hash}"); then
  echo '--- Results ---'
  echo 'FAIL. DO NOT USE this package, it does not match checksum.';
  echo 'Please notify JetBrains of this issue.'
else
  echo '--- Results ---'
  echo 'SUCCESS. Package passes checksum.';
fi
popd
10.4.2. Install to /usr/local/lib
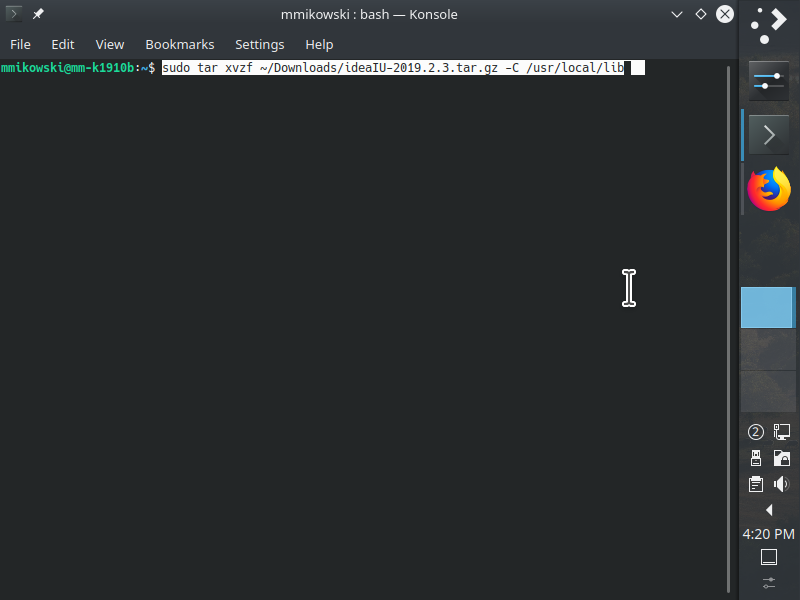
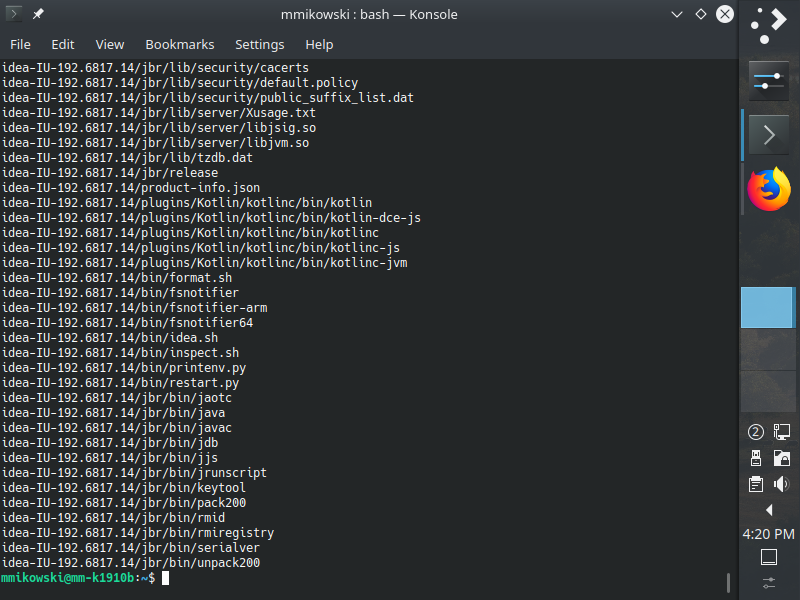
Enter the following into the terminal to install IntelliJ to /usr/local/lib.
sudo tar xvzf ~/Downloads/ideaIU-2019.2.4.tar.gz -C /usr/local/lib
10.4.3. Create symbolic links
Symbolic links ensures the paths used by the desktop do not change. We update the link to new pointers when we upgrade IntelliJ. Notice the IntelliJ release number (192.6817.14 in the code below) changes with every release and the _tgt_dir variable must be changed when that happens. Enter the following into the terminal create the desired links.
_tgt_dir="idea-IU-192.7142.36" && sudo ls >/dev/null && \
  if [ -d "/usr/local/lib/${_tgt_dir}" ]; then
    sudo /usr/bin/rm /usr/local/lib/intellij
    pushd /usr/local/lib; sudo ln -s "${_tgt_dir}" intellij; popd
    if [ ! -L /usr/local/bin/intellij ]; then
      pushd /usr/local/bin;
      sudo ln -s ../lib/intellij/bin/idea.sh intellij;
      popd
    fi
    if [ ! -d /usr/local/img ]; then
      sudo mkdir -p /usr/local/img;
      pushd /usr/local/img;
      sudo ln -s ../lib/intellij/bin/idea.svg ./intellij.svg;
      popd
    fi
    echo "--- Results ---";
    echo "SUCCESS: Installed IntelliJ symlinks";
  else
    echo "--- Results ---";


